Master Key
The Master Key
Introduction
To start this topic, it is understood that at this moment the platform is already configured with the main services and the architecture is properly implemented.
It is extremely important that the customer has a final recovery process if the instances are inaccessible and even the backup cannot be used.
senhasegura exports all privileged information to a folder at the customer's discretion. This information is encrypted using AES-256 and made available in separate files for each information and respecting the different values it may have received over time.
We call Master Key the key that encrypts and allows the opening of this data. This key is generated, using the Shamir algorithm, and distributed in different fractions to the Master Key Guardians.
By joining a portion of these fractions it is possible to recover the Master Key and have access to the data in the encrypted files.
The process of issuing and distributing the portions of the key is called Master Key Ceremony. Also known in the market as Break the glass.
The Master Key Ceremony
To carry out the Ceremony, the client must have determined which members of high trust will receive the key fraction. At least 4 members must be seconded. At least 2 members are required to open the key.
These members must go on a secure room where the senhasegura deployer must operate a secure notebook with a local printer installed.
The role of the deployer is to ensure that:
the Master Key is created;
that high-trust members receive their share of the key;
that members are instructed on the responsibility and how to use the key;
ensure that encrypted data is being created in the correct location and that members are aware of this location;
The following events of the Master Key ceremony are displayed in SYSLOG and forwarded to SIEM:
Start of the ceremony
Viewing the key part
Download PDF file containing part of the key
Closure of the ceremony
Creating the Master Key
Configuring the local directory
Warning! If you are configuring a senhasegura SaaSinstance, this step is not necessary. Go to step masterkey-creation.
Before creating the Master Key, it is necessary to configure the export location of the encrypted data. Remember that this directory must be known by the key holders.
Within the module and menu Settings ➔ Backup ➔ Servers you will have access to the records of directories where senhasegura forwards the backup internally. Create a new record using the report action button New. And in the form that is presented, keep the default data and finish with the button Save.
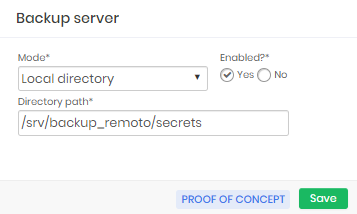
This directory is the same directory where the database and session files backup was configured. The master key files are forwarded to that same directory and automatically directed to the remote directory configured in the backup step.
In previous versions of senhasegura this entity contained more details, but the tendency is that it no longer needs this screen in the future.
Creating the Master Key
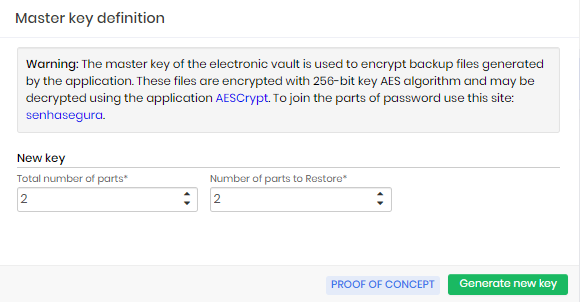
We can now create the master key and its fractions. At the module Settings go to the menu Backup ➔ Credentials.
Enter the number of fractions that must be generated and the number of fractions needed to restore the Master Key value. You can generate a maximum of 10 fractions. And to restore, a minimum of 2 fractions is required.
Click on Generate new key to access fractions of the key.
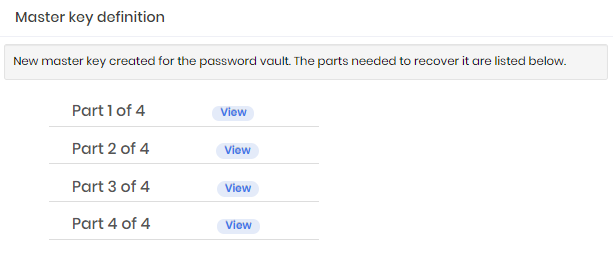
On the next screen you already have access to the created fractions. Call one of the guardians one by one so that they can confirm your information and envelop the key to which you are entitled. To do this, click on the View button for each fraction and fill out the form with the guardian's data. Print the final screen that contains the fraction and envelope the secret ensuring that the guardian has received the envelope.
At the end of the ceremony, it is important for everyone to sign the term of responsibility and presence provided by the deployer.
The deployer must now validate that the data is being exported to the destination server. To do this, access the shared folder and validate that the credentials already registered with senhasegura are replicated in the directory structure.
The structure must follow the following hierarchy:
Backup destination folder configured in Orbit;
Folder "secrets" automatically generated by senhasegura ;
Information date folder;
Entity that was exported. Example: "Credentials";
Target device composed of hostname and IP plus a repeating sequence;
Files of the exported credentials containing the username and a repetition sequence;
For example, we have the following file:
\\\\172.17.241.252\\backup\\secrets\\2020-05-22\\Crendentials\$\dlsh$
application_server_172_17_241_33_1\\root_1.aes
This file contains the root password for the device application_server
(172.17.241.33).
If the credential or device has been changed during the day, the sequential number will be increased.
Please contact our Support team if you have any questions about this procedure.
Opening the Master Key
The Master Key opening process should only be performed when the company's Disaster Recovery Policy authorizes the use of the Master Key.
In these cases the guardians should meet and access the recovery screen in this link: https://breakglass.senhasegura.com/.
From this link you will have access to the screen where the Guardians must insert their fractions of the key to have access to the value of the Master Key.
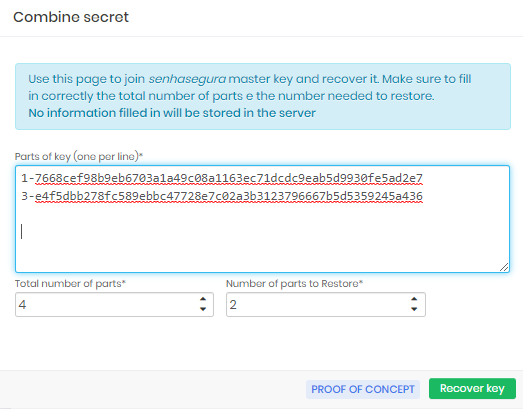

Copy the displayed value.
This key must be used during the crisis and subsequently used to issue a new Master Key.
We recommend that this key be used only to restore the secrets of services that will restore business to normal.
Every time the opening process of the Master Key is done via the link: https://breakglass.senhasegura.com/, the senhasegura Support team will be notified with a message containing all the details of the operation.
Using the open Master Key
Now that the administrator holds the Master Key open he can access the shared folder that receives the backup data from senhasegura and restore the secret using any AES-256 encrypt client.
Creating a new Master Key
After the crisis time, it is necessary to issue a new Master Key in the same ceremony format performed previously for the issue of the first key.
The customer can use either the open value of the previous Master Key or use the fractions held by the guardians to issue a new key.
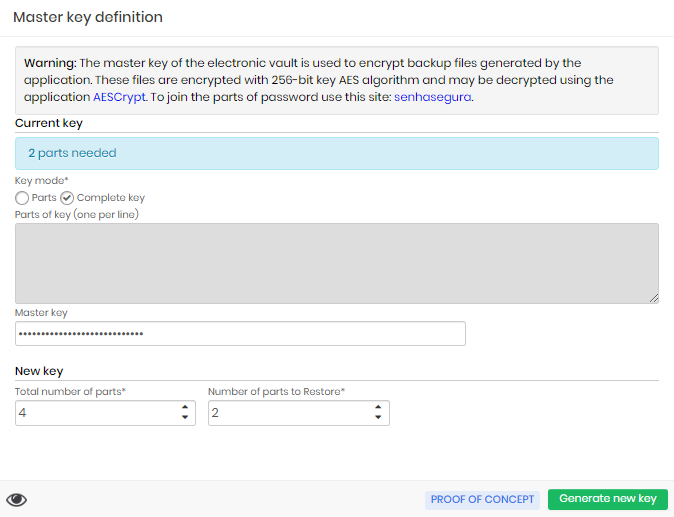
Accessing the issue screen, in the module Settings menu Backup ➔ Set master key, you can insert the fractions or the open key for the new issue.
Confirming with the footer button Generate new key senhasegura will generate a new key and present the plot distribution screen to the guardians exactly as described in the ceremony process.
Remote Master Key Ceremony
Because of scenarios where participants are remote and cannot meet physically for special reasons, senhasegura provides a way to perform the Master Key ceremony remotely. Allowing the guardians to access their fractions in a secure manner.
This functionality is only present in the 3.6 and higher versions. And a SMTP email account must be configured and determined as default.
The following events of the Master Key ceremony are displayed on Syslog:
Start of the ceremony
Viewing the key part
Download PDF file containing part of the key
Closure of the ceremony
To perform the master key ceremony remotely access the menu: Settings ➔ Backup ➔ Master Key Ceremony.
You can also access the Master Key issue form along the way: Configurations ➔ Backup ➔ Set Master Key.
On the screen displayed click on the option Set a new master key. In the form you can define the number of parts of the key for restoration, remembering that the minimum number of parts is 2.
Then select the users Guardians from the parts of the key. The displayed add button can be used to increase the number of guardians. It is important that these selected users have their e-mails registered in the system.
For security reasons, we recommend that you choose two or three times more guardians than the number of parts needed to restore your key.
Only users active in the system can be selected as guardians. Users who are guardians of the master key process must belong to at least the "View password" profile to have access to part of the key. And a user may not be a guardian of more than one part of the key.
If you wish, the form has a shortcut to the user registration, you can use it if a guardian does not yet have a user in the system.
It is important that these guardians are trusted by the organization, as the keys are a critical component to the system's security. To finish click on Save.
If you have not set up a default SMTP sending account, you will be presented with an error message with the description A default account has not been set up.
Guardians
At the end of the Master Key emission, the guardian users will receive an e-mail, SMS or even a message from the notification system about their selection as guardian of one of the parts of the Master Key.
Whenever there is a guardian with status inactive, the sytem will report it as an incident via Orbit Web and SYSLOG. A message will be displayed saying there is an inactive guardian and in order to fix it the user must redo the Marter Key cerimony process.
Each guardian must access the senhasegura to view their part:
When accessing the system, the guardian should click under his username in the top bar, as in the figure masterkey-180.

Top bar of the screen Among the options displayed the user must click on Master key
cautionUsers must enter their token before viewing their part of the master key. If the keeper does not have the second authentication factor configured, they must do so before viewing their portion of the key. This requirement can be removed from the system parameters screen: Settings ➔ System parameters, accessing the Application section and then going to the Master key ceremony part and indicating if the token will be mandatory for this action. Remember that disabling this obligation will diminish the security of the senhasegura .
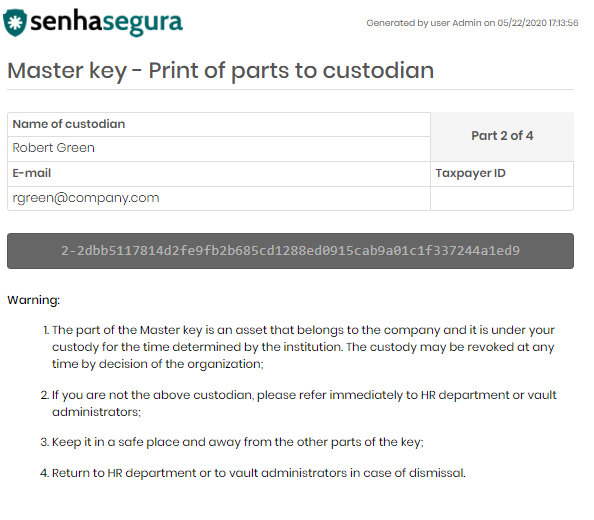
Then the screen for viewing the part will be displayed. On this screen the guardian can view, copy and even generate a file
PDF, containing your part, for download, as well as show the image masterkey-195. This screen will also inform which part the user is guardian of, the day it was generated and the date of the last view.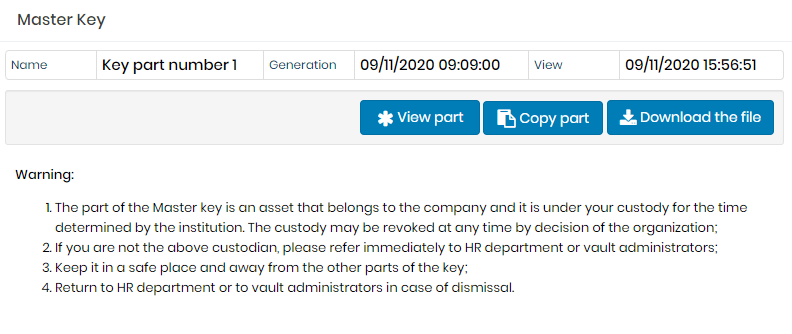
Master Key Display Screen. The PDF emission presents the same information contained in the preview screen.
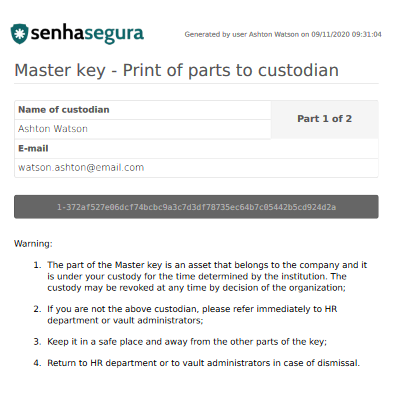
Master Key File in PDF
Dashboard
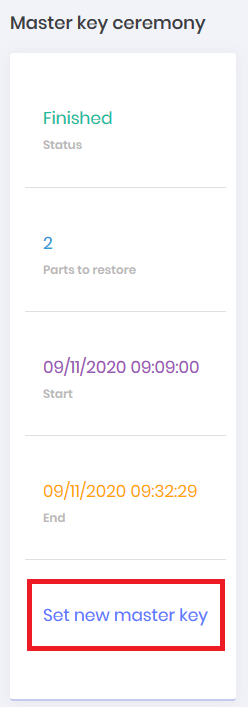
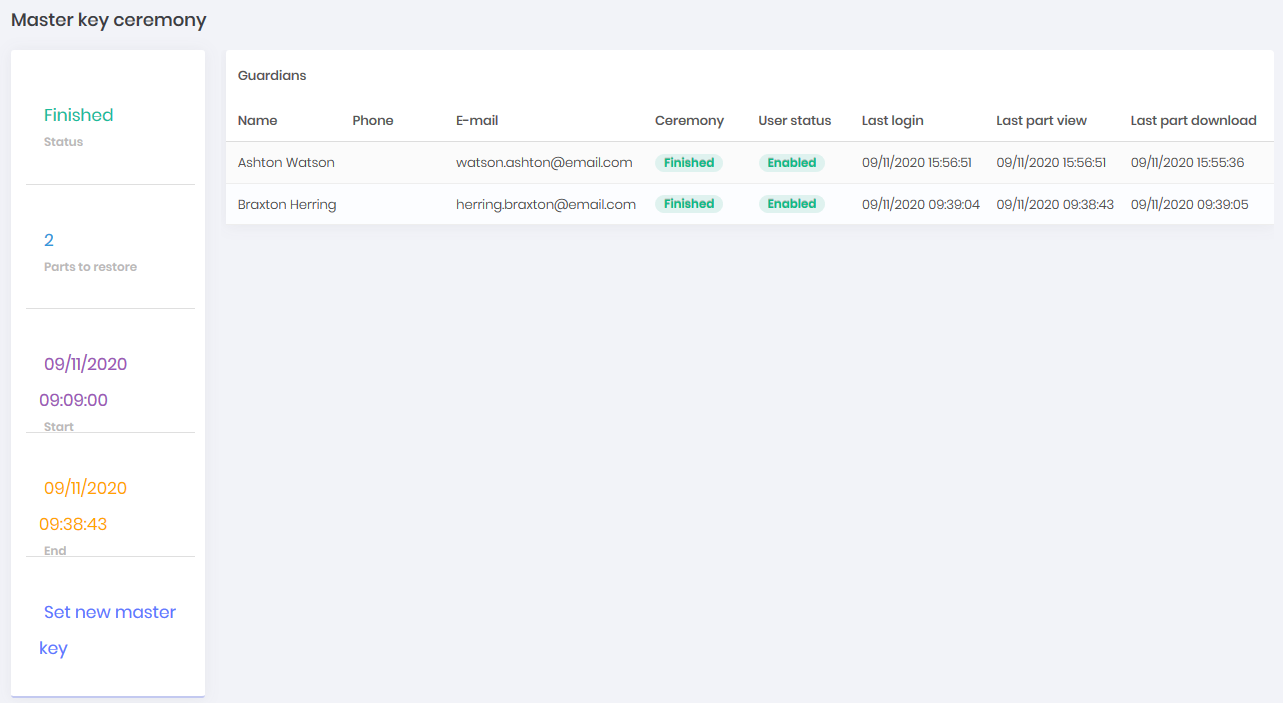
You can follow the progress of the ceremony and the guardians' relationship with their parts through the dashboard, access: Settings ➔ Backup ➔ Master Key Ceremony. On this dashboard you can follow:
Status of the ceremony
Minimum number of guardians for restoration
Date and time of beginning of the ceremony
Date and time of end of ceremony
Link to start a new ceremony
Guardian information such as: Name, user status in the safe, last view, copy or download of the part
Revealing the Master Key
Gather the guardians and on the recovery screen through the link:https://breakglass.senhasegura.com/
From this link you will have access to the screen where the Guardians must insert their parts to have access to the value of the Master Key.
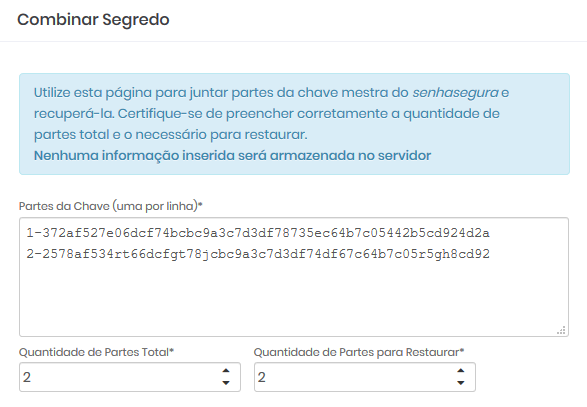
Copy the displayed value.
Then access the shared folder that receives the backup data from the senhasegura and restore the data.