Firsts Steps
You will need the credentials to connect and change configurations for all the steps below. All credentials are random to each appliance.
Suppose you did not receive the credentials after requesting the appliance machine. In that case, you can request the credential information in the support portal.
Requirements
- Physical appliance;
- Monitor and keyboard;
- 2x network cables
Step 1, connect iDRAC
- Connect cable 1x Idrac (iDrac port);
- Connect 1x for the interface 1 port;
- Plug the cable and monitor.
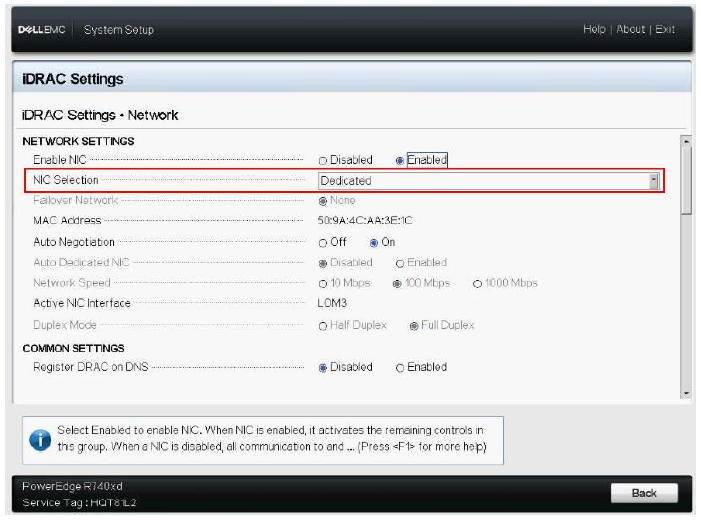
To configure the iDRAC Network Settings:
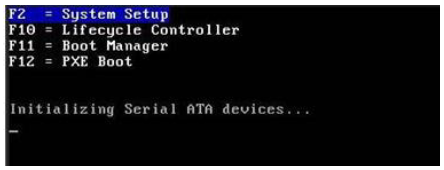
Turn on the managed system.
Press <F2> during Power-on Self-test (POST).
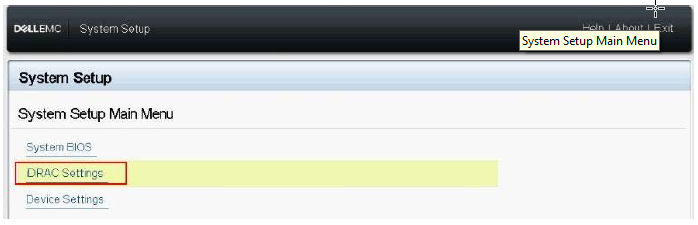
In the System Setup Main Menu, click iDRAC Settings. The iDRAC Settings page is displayed.
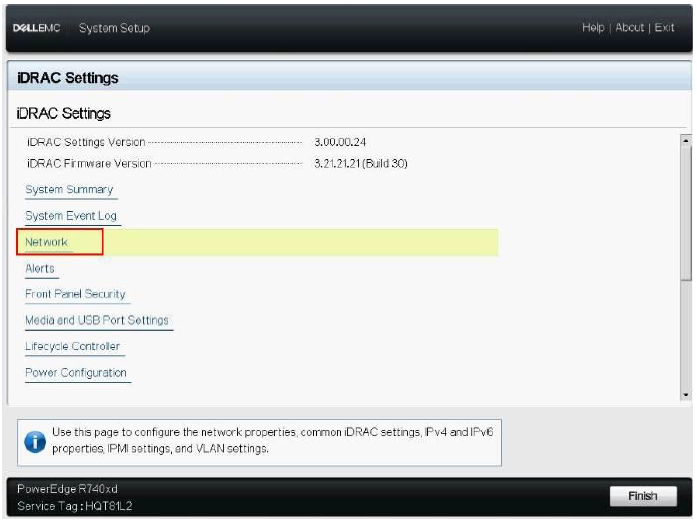
Click Network. The Network page is displayed.
Configure the network settings
Under Enable NIC, select Enabled.
From the NIC Selection drop-down menu, select one of the following ports based on the network requirement:
- Dedicated - Enables the remote access device to use the dedicated network interface available on the Remote Access Controller. This interface is not shared with the host operating system. Note, the Dedicated options are displayed in blade servers as Chassis (Dedicated).
- LOM1
- LOM2
- LOM3 - May not be available depending on server model and network card selection.
- LOM4 - May not be available depending on server model and network card selection.
From the Failover Network drop-down menu, select one of the remaining LOMs. If a network fails, the traffic is routed through the failover network. Note that this option is disabled if NIC Selection is set to Dedicated.
Under Auto-Negotiation, select On if iDRAC must automatically set the duplex mode and network speed. Note that this option is available for dedicated mode.
Under Network Speed, select either 10 Mbps or 100 Mbps. Note that 1000 Mbps is available only if the Auto-Negotiation option is enabled.
Under Duplex Mode, select the Half Duplex or Full Duplex option. Note that this option is disabled if Auto-Negotiation is set to Enabled.
Common Settings If the network infrastructure has a DNS server, register iDRAC on the DNS. These are the initial settings requirements for advanced features such as Directory services—Active Directory or LDAP, Single Sign-On, and smart card. To register iDRAC:
- Enable Register DRAC on DNS.
- Enter the DNS DRAC Name.
- Select Auto Config Domain Name to acquire a domain name from DHCP automatically. Else, provide the DNS Domain Name.
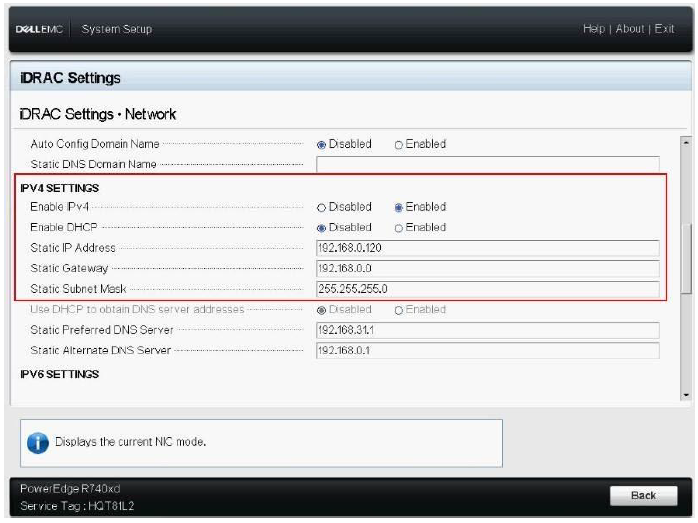
Configure IPv4 settings To configure the IPv4 settings:
- Select the Enabled option under Enable IPv4.
- Select the Enabled option under Enable DHCP to automatically assign the IP address, gateway, and subnet mask to iDRAC. Else select Disabled and enter the values for:
- Static IP Address
- Static Gateway
- Static Subnet Mask
Configure IPv6 settings
- Select the Enabled option under Enable IPv6.
- For the DHCPv6 server to automatically assign the IP address, gateway, and subnet mask to iDRAC, select the Enabled option under Enable Auto-configuration.
- In the Static IP Address 1 box, enter the static IPv6 address.
- In the Static Prefix Length box, enter a value between 0 and 128.
- In the Static Gateway box, enter the gateway address.
- If you are using DHCP, enable DHCPv6 to obtain the DNC Server addresses to obtain Primary and Secondary DNS server addresses from the DHCPv6 server. You can configure the following if needed:
- In the Static Preferred DNS Server box, enter the static DNS server IPv6 address.
- In the Static Alternate DNS Server box, enter the static alternate DNS Server address.
Click Back.
Click Finish. The Save Changes popup is displayed.
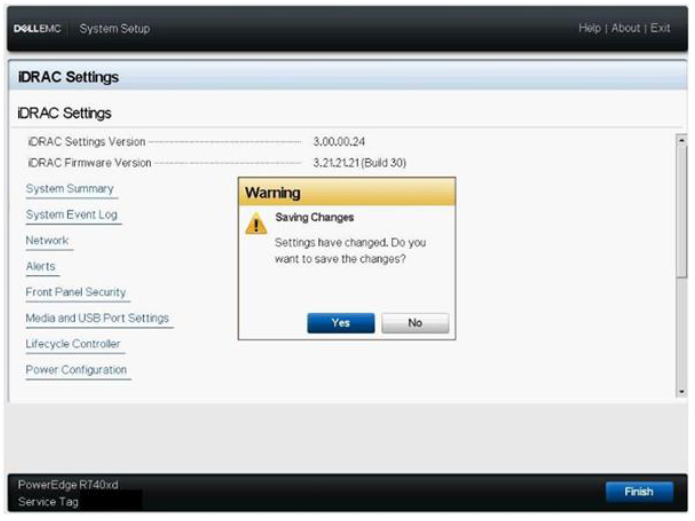
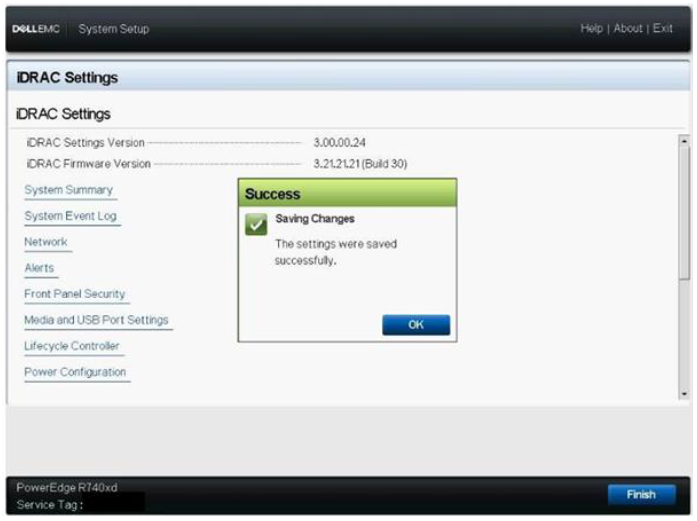
Click Yes to save the changes. The network information is saved, and the system reboots.
Important: After configuring the iDRAC IP address, change the default username and password.
For more information about IDrac check this documentation
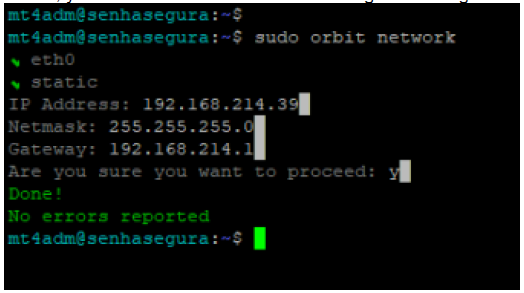
Step 2, setting appliance IP
At the login screen, log in as root.
- Password at the end of the file.
Edit the file interfaces, /etc/network/interfaces.
sudo vim /etc/network/interfaces- Uncomment the line with IP and set the IP set for the appliance.
- Save (type, :x, to save and exit the vim) and reboot.
Step 3, access senhasegura VM
- Connect to the appliance terminal again:
- Run command “xl list”
- It will return senhasegura vm name, something like “senhasegura or ss-p”
- Run “xl console VM [vm name]” (get from the item before).
- Now, you should be at the senhasegura login screen.
Step 4, senhasegura
- Login with senhasegura management user:
- User: mt4adm
- Password: mT4SeG@s2s or mt4adm
- Execute the command
sudo orbit hostnameto change the default hostname of this instance of the senhasegura. It would be best if you changed its name to create a valid application activation code;
- In the end, you should receive a success message according to the example;
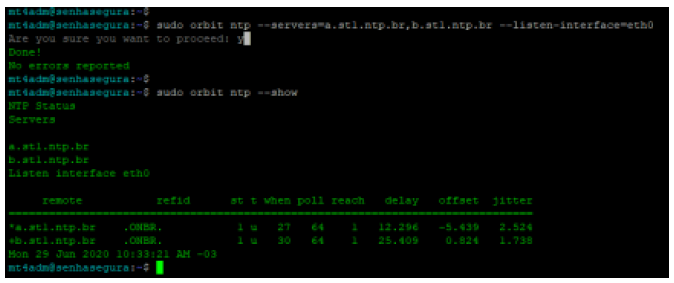
Now that the network interface is appropriately configured, let’s configure the NTP server to correct the server time;
sudo orbit ntp --servers=SERVER1,SERVER2 --listen-interface=eth0
Then reboot using command:
sudo orbit shutdown --reboot