Appliance Settings
Addressing setting
To perform the addressing setting, follow these steps:

Access the menu: Overview ➔ iDRAC Settings ➔ Network;
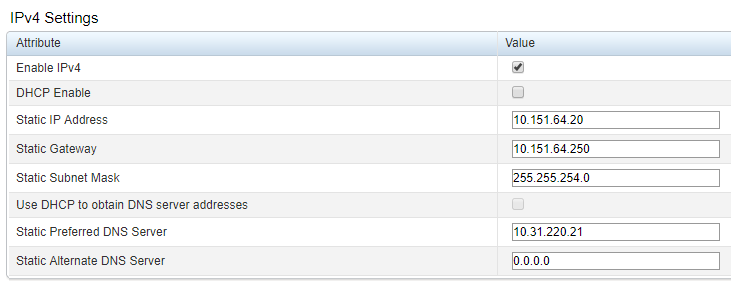
IPv4 Settings Fill in the following fields:
Enable IPv4:If this option is selected, the IPv4 protocol will be enabled. By default, it must always be selected.
DHCP Enable:If this option is selected, the DHCP protocol will be enabled to assign the server IP
Use DHCP to obtain DNS server addresses:If this option is selected, the DHCP protocol will be enabled to obtain DNS server addresses
If the DHCP Enable field is not selected, fill in the following fields:
Static IP Address:Server IP;
Static Gateway:Server gateway;
Static Subnet Mask:Server Subnet Mask;
In the Services tab, fill in the following fields:
SNMP Community Name:SNMP community name;
SNMP Protocol:Indicates which SNMP protocol will be used;
SNMP Discovery Port Number:Discovery communication port number;
Click on the Apply button to apply the settings.;
SNMP Service Settings
SNMP, or Simple Networks Management Protocol, is a standard protocol for network monitoring and management supported by network assets, such as routers, switches, and servers.
To adequately set up the service, you must identify the format of the version supported by the environment and the tool that will monitor the PAM Crypto Appliance. To use SNMP v3, you must create a user with privileges for the authentication process between the monitoring tool and the PAM Crypto Appliance.
To set up the SNMP service with the monitoring tool information:
Access the menu: Overview ➔ Server ➔ Alerts ;

Alert Options Fill in the following fields:
Alerts:Indicates whether the alert service is enabled or not;
Category:Select the categories of the alerts that will be sent;
Severity:Select the criticality of the alerts that will be sent;
On the SNMP and Email Settings tab, fill in the following fields:

IP Destination List Settings State:Indicates whether the alert target is enabled or not;
Destination Address:Alert target server IP;
SNMP v3 Users:Select the SNMP user;

SNMP Settings Community String:Community string name;
SNMP Alert Port Number:Communication port number for sending alerts;

SNMP Trap Format Settings In the SNMP Trap Format field, select the format of the SNMP traps;
Click on the Apply button to apply the settings;
SNMP v3 User Creation
To use SNMP version 3, you need to create a user with privileges through the iDRAC interface. The monitoring tool performs the authentication on iDRAC and thus gathers the information defined in the metrics.
To create an SNMP v3 user, follow these steps:
Access the menu: Overview ➔ iDRAC Settings ➔ User Authentication;
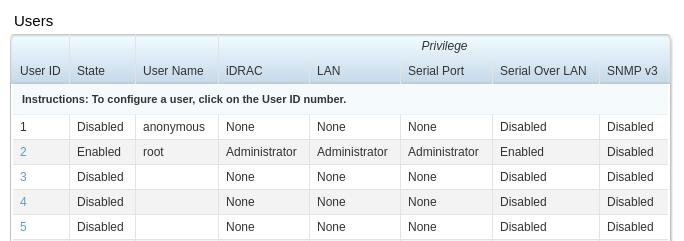
Users report The users configured in the iDRAC will be displayed on this screen, along with their status and their respective privileges.
Select a user that has the Disabled value in the State field;
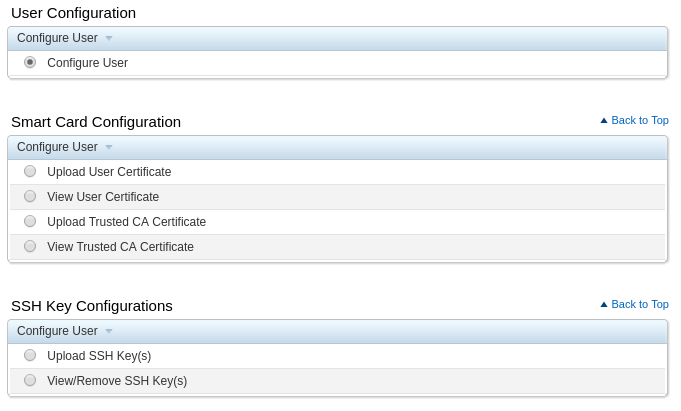
Users Configuration screen Select the Configure User option in the User Configuration section.;
Click on the Next button;

Users Configuration screen In the General section, fill in the following fields:
Enable User:If this option is selected, the user will be enabled;
User Name:User login;
Change Password:If this option is selected, the user must change the password on the first access;
New Password:User password;
Confirm New Password:User password confirmation;
In the SNMP v3 section, fill in the following fields:

SNMP v3 Configuration screen Enable SNMP v3:If this option is selected, the SNMP v3 protocol will be enabled;
Authentication type:Select the authentication type of the SNMP v3 protocol;
Privacy type:Select the privacy type;
In the iDRAC User Privileges section, enable the System Control field:
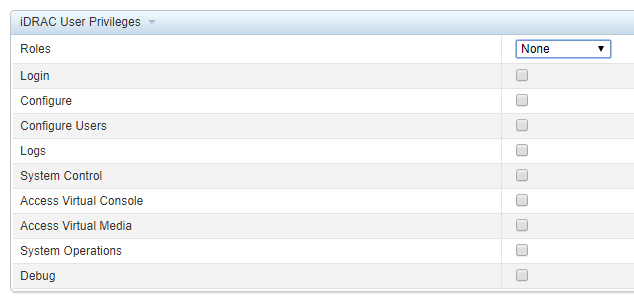
SNMP v3 Configuration screen Click on the Apply button to apply the settings;