Graphical User Interface
General Instructions
Introduction
The purpose of this document is to provide instructions for senhasegura users. This is a general instruction that is recommended that every user independently of being a Common, Administrator or Auditor user must know about senhasegura . MT4 Tecnologia provides support to senhasegura through an online knowledge base, as well as telephone and email support. Consult your system administrator for more information about the options available to your company.
About senhasegura
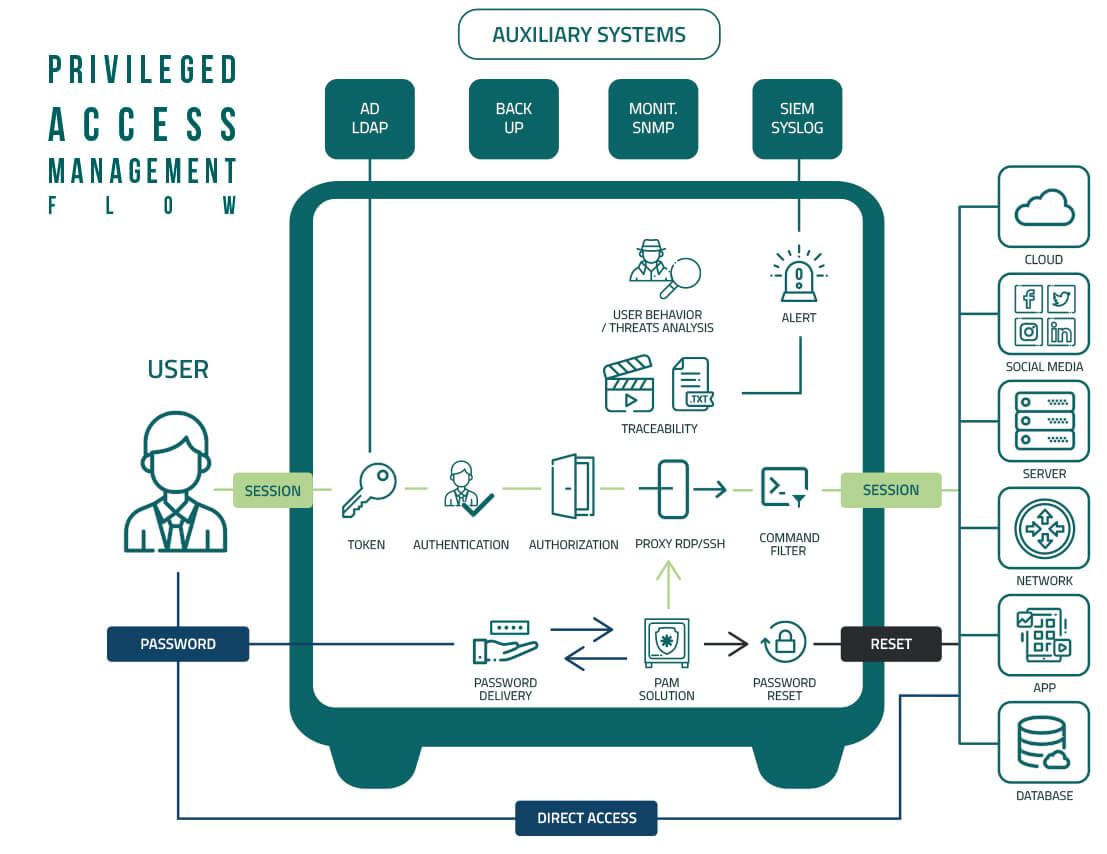
senhasegura is a software and hardware system that stores manages, and monitors all credentials such as passwords, SSH keys, and digital certificates in a secure, tamper-resistant location. Through the use of encryption mechanisms, the password vault offers users the possibility to use a password only to access a series of credentials registered in senhasegura . It is possible to access all network resources through the SSH, RDP and other protocols, storing all history of their use for auditing and compliance analysis.
In organizational environments, exposure and misuse of privileged accounts is extremely inviting to cyber-attacks. In recent attacks on corporations of all sizes, attackers steal and exploit privileged accounts to take hostile control of the entire enterprise infrastructure.
By this way hackers can exploit the entire virtual space, literally moving across the corporate network undetected, and thus achieve the objectives of the attack.
The senhasegura architecture consists of a set of integrated component layers that support the operation, from the physical layer to the application layer. Each of the components has different and specific functions.
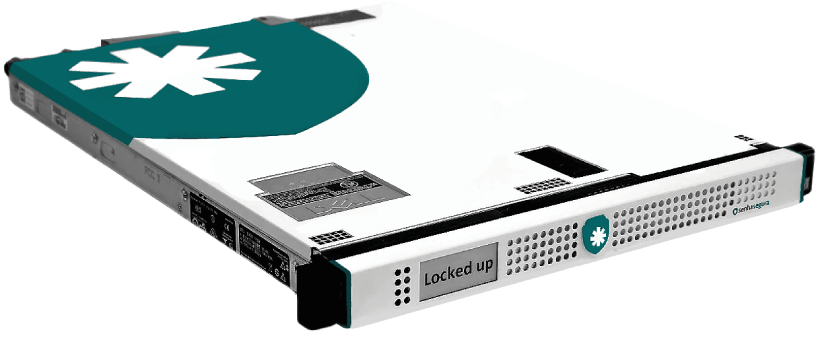
PAM Crypto Appliance
For companies that want a higher level of security, guaranteed performance and a centralized software and hardware support service, senhasegura offers a set of appliances sized for each need, depending on the number of concurrent users and the desired recording time. This equipment can be supplied with senhasegura onboard to facilitate software and hardware installation.
Terminology
senhasegura uses a specific terminology for its functions. Some terms must be understood before its use.
Access Group: Used to grant and manage views and access to vault credentials
Auditor: Specialist who analyzes senhasegura data to verify that your organization's security instructions are being followed
System parameters: behavioural settings that can be adjusted globally in senhasegura ;
Governance Code: is used to associate an activity performed in senhasegura to a Change Management item, such as a Help Desk ticket, for example;
Parameters by equipment: Behavior settings that can be adjusted for each equipment.
Password Custody: User possession and use of credentials stored in senhasegura .
Password Parameters: Behavior settings that can be adjusted for each credential;
Password Policy: A set of rules designed to enhance the security of users and devices across the enterprise.
Password strength: measures the effectiveness of a password against attacks and is based on an estimate of the number of attempts to guess it.
Protected Information: any kind of internal information, such as hashes, personal passwords, RSA keys or digital certificates;
User: Own employees, interns or third parties who use or may need access to company systems.
Login
To login at senhasegura type the URL or the IP in the browser:
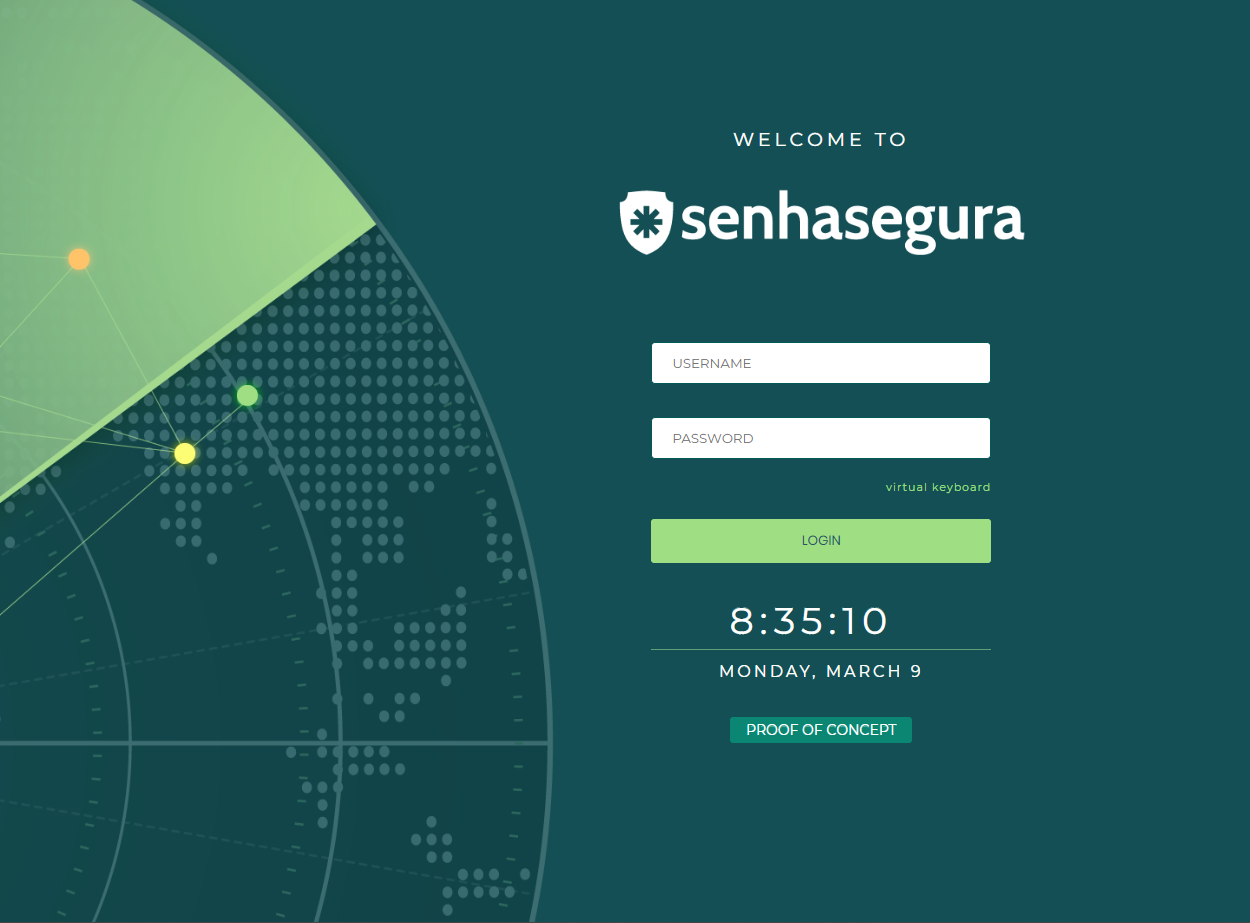
Fill on the fields with your user name and password and press Login to continue. To use the virtual key board click on its title.
The access can be made by using the network user for authentication through Active Directory1, if configured. In this case, the same password as the network user must be used. You can access senhasegura through a local user on the system.
If a local user is used, at the first access, the user may be required to change the password in accordance with the security policies and password strength of the organization.
EULA
When making the first access in the senhasegura , during the process of activation of the instance it will be necessary to make the acceptance of the EULA2.
During this acceptance the user must enter: his name, e-mail, company and position. With this you will be able to access the initial screen.
This acceptance will only be made by administrator users who have access to the module Orbit. And it should be done at each update of the EULA text.
Main screen
After the login the main screen is shown. To login at senhasegura type the URL or the IP in the browser:
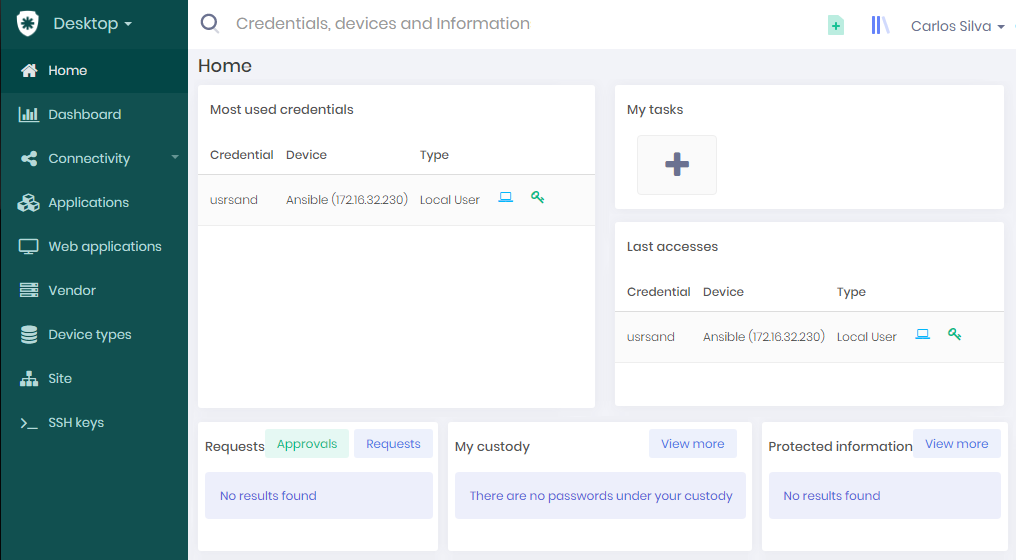
The user's Desktop screen is composed of the following components:
: Left column menu
: Quick search field
: Quick actions icon
: Access to PAM Solution Center
: Screen update icon
: Home screen return icon
: senhasegura help icon and once clicked, it is possible to select 'Documentation and support', 'Watch and Learn' and 'Community'
Also the Username on the top and the Home panel. Each of these components will be detailed in sequence.
Left Column menu
The access to the screens is made using the left column menu.
The senhasegura has many modules and the left column menu is different for each module. To change the module click on the shield icon on the top left of the screen to see the Modules Panel.
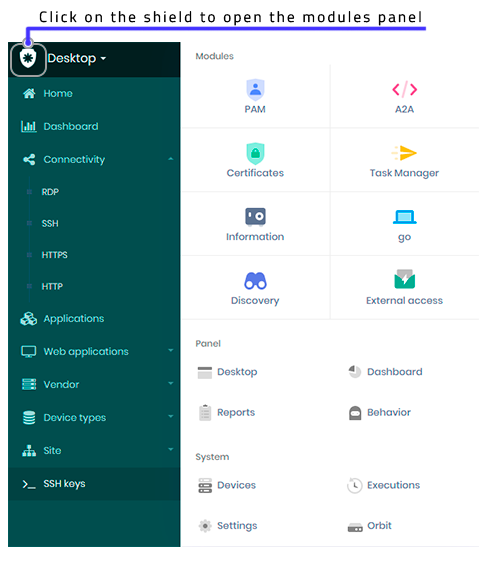
Once the module is chosen the drop down menu opens the functions of this module. These menus have a hierarchy and it opens and closes depending on user choice.
The explanations of the functions are in specific documents. The purpose here is just an overview to beginners to navigate through senhasegura . By clicking one menu item the Home Panel will be changed to the function selected,
Quick search field
At the top of the screen there is a field to facilitate the searches.
Write a text that best represents your needs and senhasegura will look for similarities in names of credentials, devices and information search bar.
To perform a quick search enter the term in the search bar and press enter. The result will be shown on the top of the main panel.
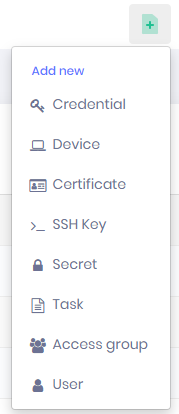
Quick new items actions
Clicking on this icon a set of quick actions will be displayed. Chose the one of interest to register an item. As said before each function is detailed in a specific manual the intent here is do demonstrate the possibility of shortcut the access to these functions. The options shown as follows may depend on privileges of the user.
PAM Solution Center
senhasegura has an online mean to access instructions of use in its PAM Solution Center. Clicking on the following icon and login the user can access the set of senhasegura manual to user, administrator and auditor.
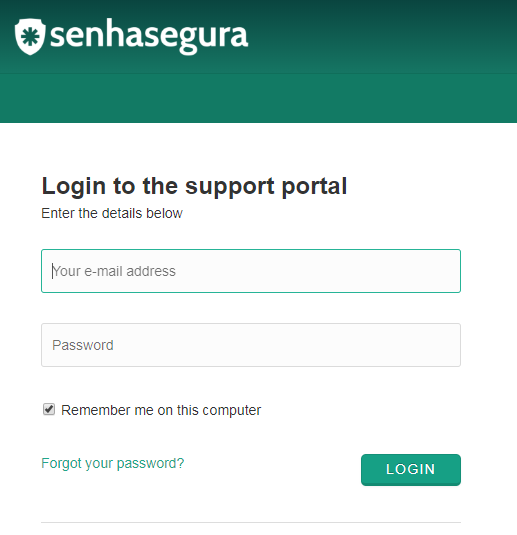
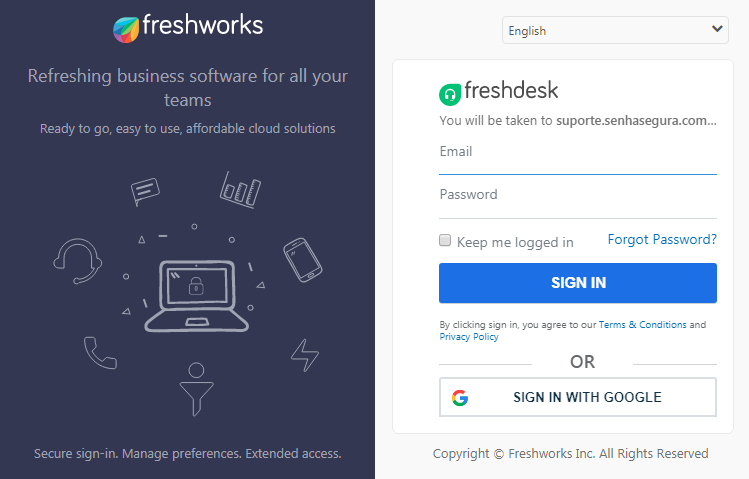
If you an agent make your login here and you will have online assistance.
User preferences
Clicking on users name a box will be shown with options depending on user privileges.
Change Password
Click this option to change your password.
At first access senhasegura will ask for changing the password. Follow the password criteria shown in the screen and press save. A success box will be shown if the password is changed, other way an error message will be displayed.
Preferences
Click this option to change the graphical interface idiom. In the Default Language field, select the new display language and click the Save button.
Token
See subsection:userpreftoken.
Change Profile
Using this option and depending on users group of access the profile of another user can be assumed. In general an administrator with high levels of privileges, if so registered in his profile can assume the position of another's privileges user.
The actions permitted are only of consulting and any access is logged to the real user, not the assumed one. The objective is to allow the administrator to see what another user, in another profile would see.
In this case, the permissions allowed will be the ones of the profile assumed but the register on the actions in senhasegura will be in name of the original user.
Choose another user, press Take on profile or cancel the action.
Orbit
This option is a shortcut to Orbit functions. The orbit main screen is shown for reference, but its functions are explained in the specific manual.
Exit
Click this option to close senhasegura and exit. A confirmation will be asked.
Main Panel
This is the main screen and was shown in the initial image for reference and will be explained in the specific manual of the screen modules. At the first time opening the main panel will show the Home panel. Next time the user opens senhasegura this panel will be the same one the user was when exiting senhasegura .
Enabling MFA with OTP token
Through the shortcut User preferences, described in this manual in the section subsection:userpref, you have access to the menu Token. Click on this menu to activate your MFA OTP token.
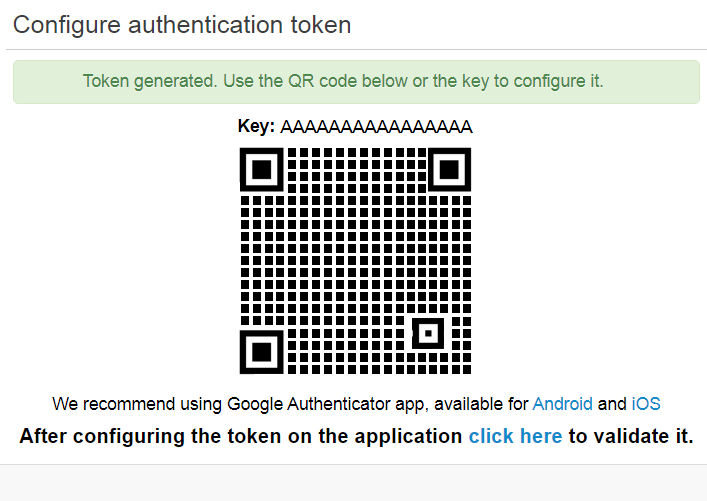
Scan the QR code using your desired OTP tool. Eg Google Authenticator.
Once configured in your application, click on the link click here to validate the first token
From this point on, each login the system will ask for a valid token.
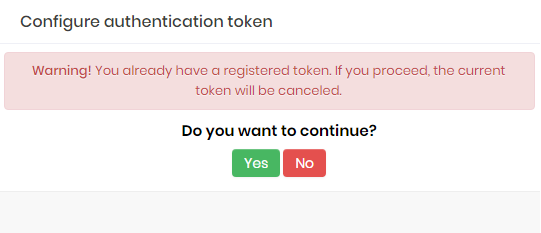
If the user already has a registered token, an alert will be shown.
If you ever lose your token issuer, contact your administrator to have them deactivate your MFA secret.
Typical screens
Typical form screen
The following picture is a standard registering form. It has two basic functions one is to open a clear screen to insert a record and the other is to allow the user to see the registration details and edit them.
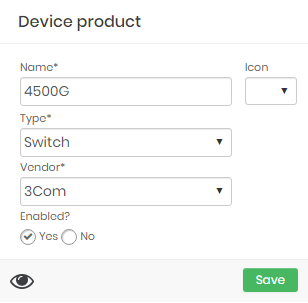
To create or edit a record fill on the attributes on the screen and press the button Save. A success box will be displayed if the action is correctly done. In case one field is required the edit component will become in red with a tip as shown below.
When there the possibility of including more than one option per register use the + icon to include as many items as necessary.
To remove one item of the list click on the trash can and a confirmation is asked.
The eye icon at the bottom left position is to show the user that have created and modified register for traceability means.
Typical report screen
senhasegura has a lot of report screens that are very similar in respect to its use. The knowledge of its operation mode will facilitate the users in getting information.
Reporting screens are those that display a table or grid with columns and rows as a result of a database query. It usually has a filter bar where the user can limit responses to fewer lines showing only those that meet the defined conditions.
The next image shows a typical report screen and its parts.
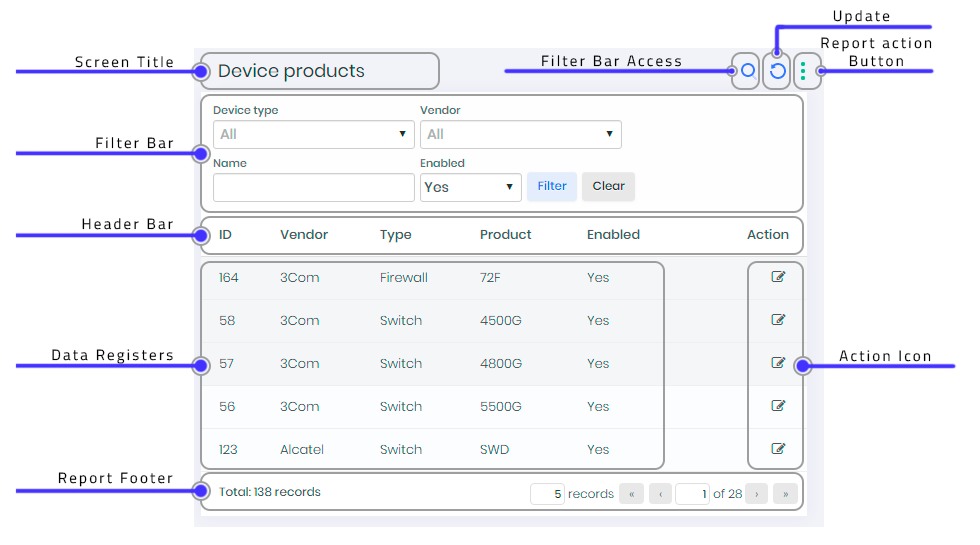
Following the vertical order we have:
Screen title: Shows the title of the screen. If the mouse pointer is over the title the screen number is shown.
Filter bar: This bar have components that if chosen will filter the result showing only the part of the registers that match with components filled. Press the button Filter to execute the search. The button Clear clears all choices made before on filter's components, if any. This bar can be shown or hide clicking on the magnifier glass on the top right corner of the screen.
infoYou can fix the search bar via the menu: Settings ➔ System parameters ➔ System parameters. Go to the Application tab and in the section Hide filters by default? choose the option No
Header bar: Shows the title of the columns of the report. Many times the last (to the right) column is an Action column. This will be explained further. By clicking in the column title the registers will be ordered by the contents of this column. Clicking again the order will be inverted.
Data registers: Shows de data selected;
Report footer: Shows the total of records found an allows the user to configure the number of register per page and navigate by the pages;
Filter bar access: When clicking the magnifier glass the filter bar is or hide the filter bar;
Update: Update the data displayed on the report;
Report action button: Three points button that open a small window with the actions that can be made from this report. Each report has its own options but in many cases the options are:
New: To create a new register;
Update: To make an access to the data base and get the updated results;
Print: To generate a .pdf file for archiving or effective printing as the following.
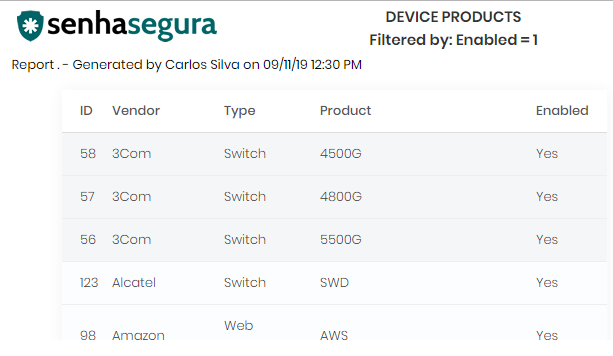
Report rendered for print Export csv: To export the data to a .csv file as the following example.
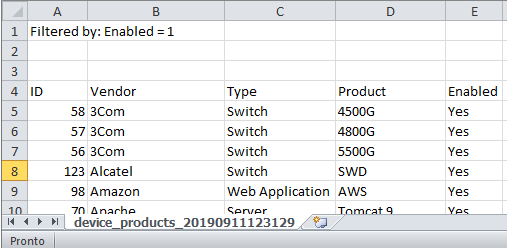
Report rendered and downloaded as CSV file Action column: sometimes there are specific action icons associated to the register of the line it belongs. When the mouse pointer is over the action icon its action is shown. Click the icon to execute the action.
Register action button: if shown click on it to see the actions options available to this register. Depending on user privileges and the properties of the register the options may be different, for example it is not possible to inactivate a register already inactive.
Customized logo
It is possible to add a customized logo on senhasegura There is the possibility to choose one logo for the internal pages of the application (Desktop logo), as well as there is the possibility to choose a logo for the login page (Login screen logo). To add a logo go to: Menu ➔ Settings ➔ System Parameters Logo
The files have to be in .PNG format and it is important to notice and consider the recommendation and maximum file size limits.
Until this version of senhasegura it is not possible to remove a logo. Once you register a logo, it will not be possible to remove it.
Screens with tabs
Some entities have a big number of fields to be informed and in this case a screen with tabs facilitates the filling. The user can click in the tab to change the tab to be exhibited. The Save button if it is the case only may be pressed if all the required fields in all tabs are filled. The next figure shows a typical screen with tabs.
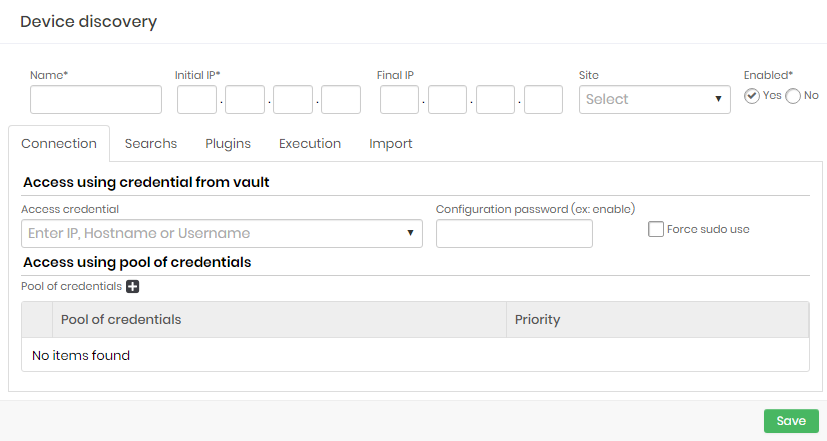
In this example there are five tabs Connection, Searches, Plugins, Execution and Import. Over the tabs it's shown the main identification of the register.
Message boxes
In many different places senhasegura interacts with the user, to alert, ask confirmation, inform success in an asked action, and so on. It Follows some examples of these messages boxes.
Confirmation box
In many actions of the system the user will be asked to confirm the action with a box like this:
Success box
When an action is correctly ended a success box will be shown.
Unsuccessful box
If an action requested do not end correctly because any problem or unexpected situation a unsuccessful box will be shown.
Alert box
In some cases an alert box is shown to explain to the user the consequences of its actions and expect a confirmation. It works almost same as a confirmation box.
Instruction banner
In many screens a instruction box is shown in the screen to help the user in filling on the screens fields. The user may pay attention to them while not being familiar with these screens.
Warning banner
Graphic
senhasegura has many graphics in its dashboards for example pies, lines, bar columns and so on.The dashboard pages may display the following button:
: Icon to download graph or dashboard information
Some characteristics of the graphics is shown as follows.
Pie graphic
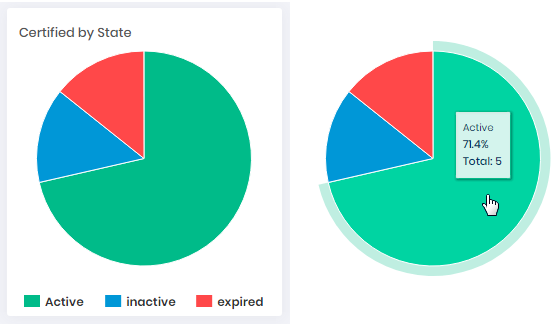
If the mouse pointer is over the graphic image the corresponding property and value will be shown.
Bar graphic
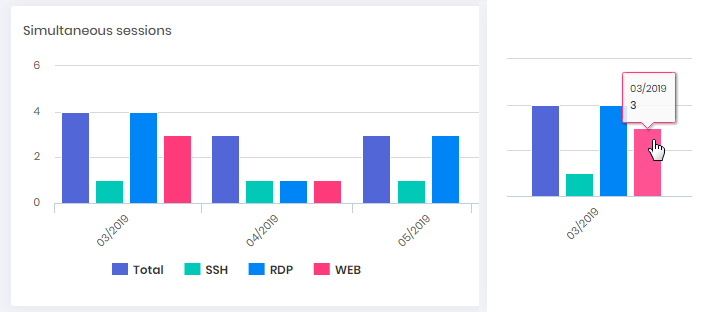
If the mouse pointer is over the bar image the corresponding property and value will be shown
Line graphics

If the mouse pointer is over the line image the corresponding property and value will be shown.
Conclusion
This document explained the manner of using senhasegura interface in a general manner. Other documentations will explain functions in detail depending on the subject and on the category of the user, if is a user, an administrator or an auditor. If more information is necessary contact the senhasegura administrator of your organization that he will be able to help directly or with the assistance of senhasegura support team assistance.
Microsoft proprietary tool for user management↩
- https://senhasegura.com/eula/senhasegura-eula-eng/