Jenkins
Jenkins by default allows environment variables to be set within the execution of jobs. It also allows safe storage of values that can be used within these same pipelines without exposure, however the administrator's challenge is ensuring that these same variables are automatically rotated without creating any issues on the DevOps pipeline.
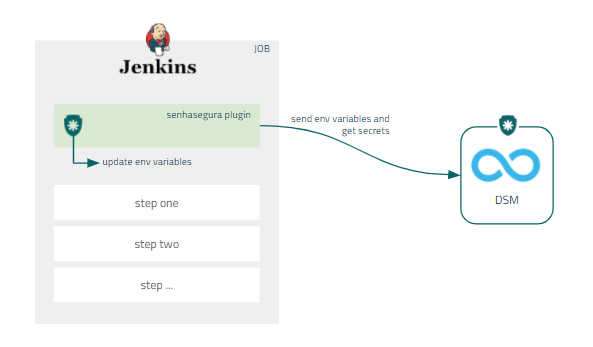
Through Jenkins' native architecture, senhasegura DSM enables environment variables to be set at pipeline runtime through our Jenkins plugin.
In addition, to ensure better governance for administrators, all variables that are available in the Job environment will be sent to senhasegura DSM as a way to discover any sensible data running unnoticed.
Deploy Jenkins Plugin
DevOps Secret Managemet provides a native plugin so Jenkins jobs can fetch secrets directly from senhasegura transparently. Also, this provide an easy way to configure secret injection. The plugin is available for download using this link.
To install the senhasegura Jenkins plugin using the .hpi plugin file, follow the steps bellow:
- Access your Jenkins instance;
- On the home page, click on the Manage Jenkins option on the side menu;
- Click on the Manage Plugins option;
- On the Advanced tab, go to the Upload Plugin section and browse to the .hpi file;
- Click on the Upload button;
- To finish the installation, restart Jenkins;

senhasegura Jenkins plugin is only available for Jenkins 2.235.1 or newer versions.
Make sure you select OAuth 2.0 as Authentication Method on senhasegura DSM since the plugin uses it to fetch secret information.
Configure Jenkins Plugin
Once the plugin is installed, access your Jenkins instance and follow the instructions bellow:
- Create a new Job or select an existing one;
- In the side menu, click on the Configure option;
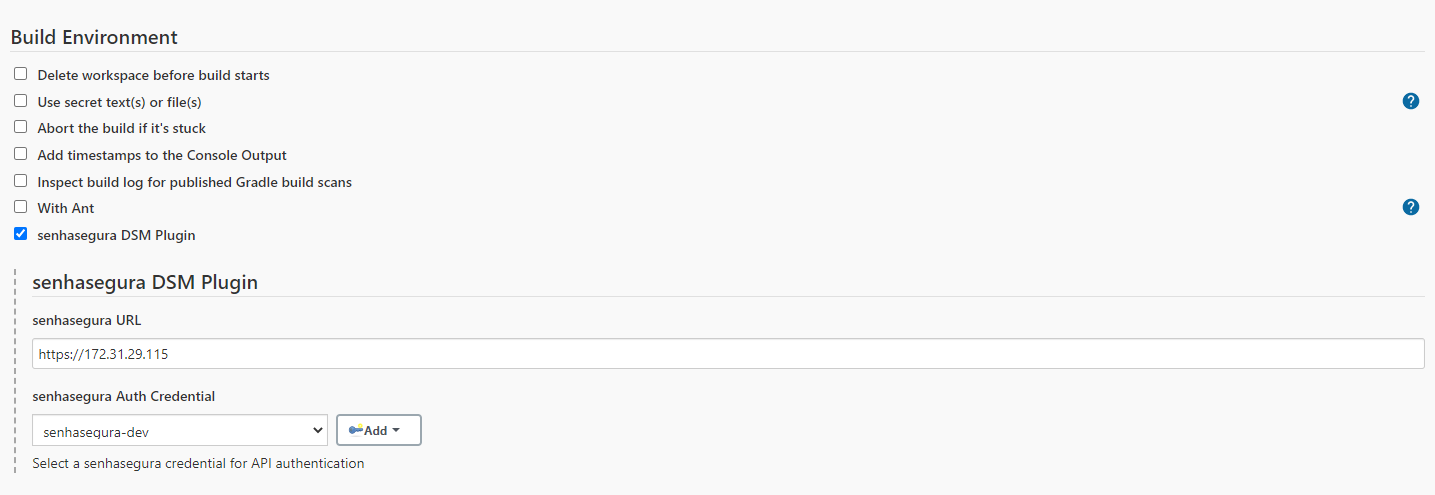
- Scroll down to the Build Environment section and mark the senhasegura DSM Plugin checkbox;
- In the senhasegura URL field, enter the senhasegura instance access URL;
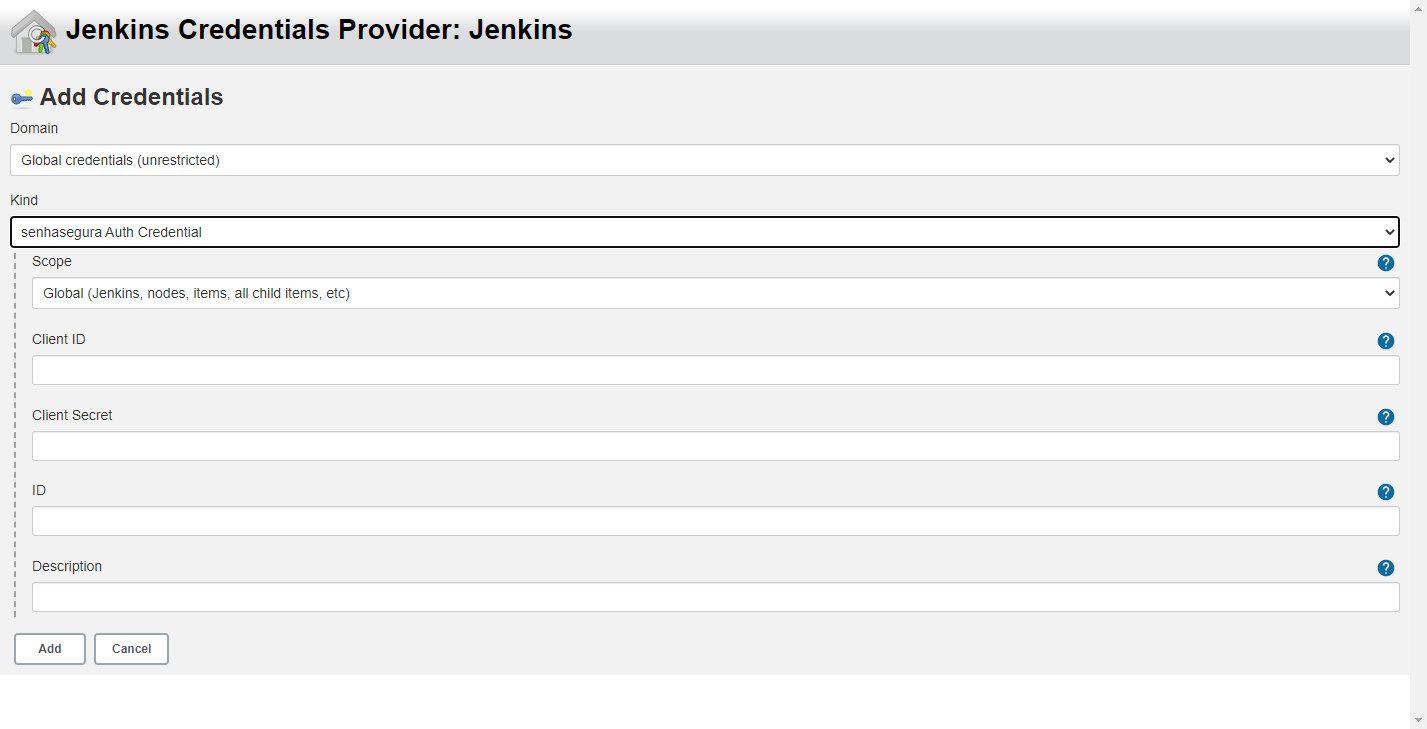
- Click on the Add button to create a new Jenkins credential;
- At the opened window, select senhasegura Auth Credential as the Kind;
- Fill the fields Client ID and Client Secret with senhasegura DSM provided data;
- Optionally, provide an ID and a Description, then click on the Add button;
- Finally, in the senhasegura Auth Credential field, select a credential created in the previous step;
Use Jenkins Plugin to Inject Secrets
After configuring the plugin in the project, follow menu Build now to run the pipeline and use the secret data.
Once the job finishes, click on the Job ID ➔ Console to display the execution result;
