Access Group
Task Manager Access Groups are different from Credentials Access Groups. Therefore, the fact that a user has access to using a particular credential in Task Manager does not guarantee access to the same credential for password withdrawal or proxy session.
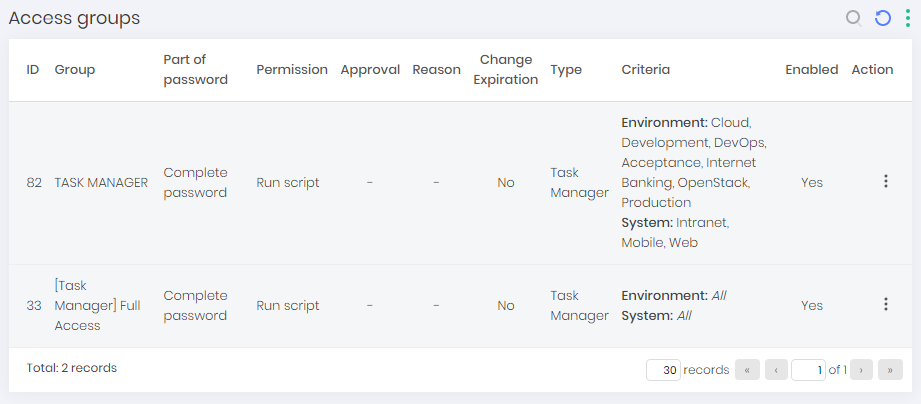
Through the Task Manager ➔ Settings ➔ Access Groups menu you will have access to all created groups, being able to create new or maintain existing groups.
Registering an access group
In order for the task created to be viewed, the users who will execute it must be in an access group for the tasks. To create this access group follow the instructions:
Access Task Manager ➔ Settings ➔ Access group
Click the Show actions button on the report
Click on the New group option

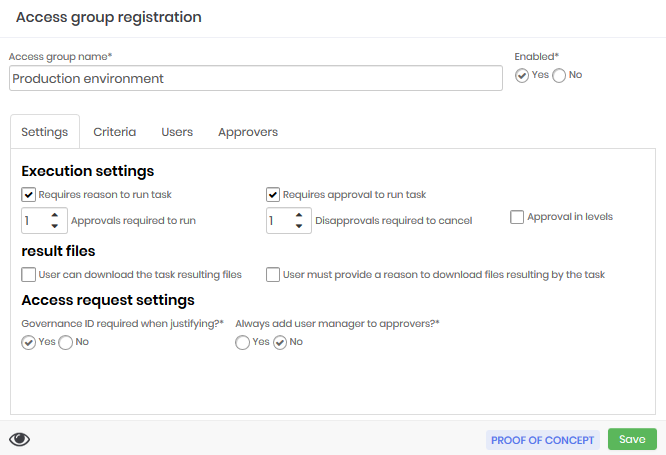
Task Manager access group registration form Define the group's permissions and whether group members should justify and/or request approvals to run a task, as shown in the figure grupodeacesso-enus
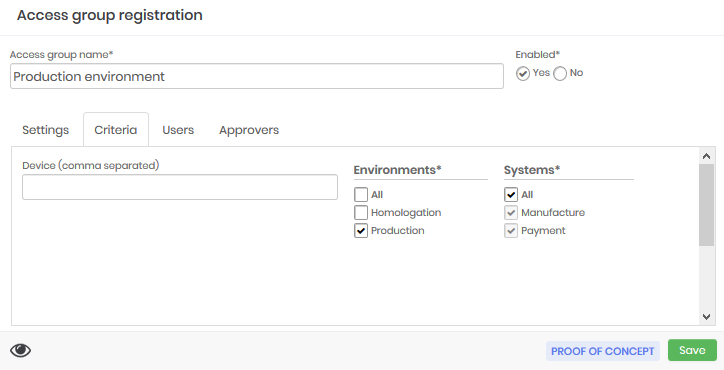
Go to the guide Criteria and choose the Environments and Systems where the members of this group will be able to perform the tasks
Go to the Users tab and click the Add button and select the users that were part of this group and then click Add Selected as in the figure grupodeacessousu-enus.
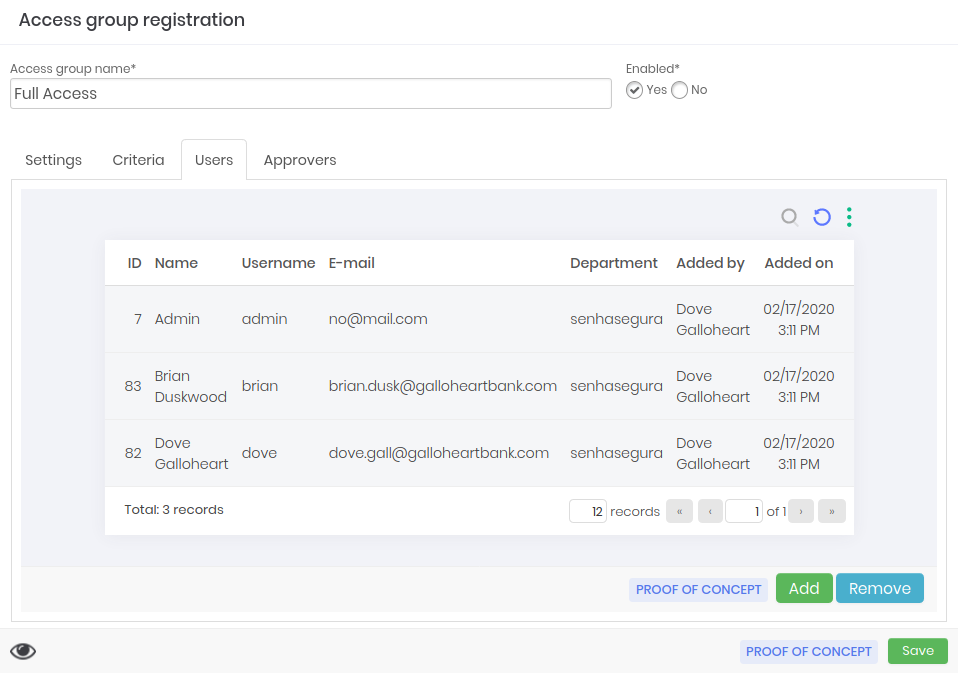
User registration form for the Task Manager access group If you have selected a user by mistake click the Remove button and similarly select the users you wish to remove.
If you have defined in the guide Configurations that group members need approval it is important that the guide Approvals be filled out.
As the users were selected in the previous step, select the approvers.
cautionIf the approval is in levels, you must also define the approval level of each one.
infoYou can check your task execution requests via the menu Task Manager ➔ My requests.
If you are an approver check the requests made to you through the menu Task Manager ➔ My approvals
With these settings you will be able to register and run a task as we will see in the next chapter. % Redefinindo a pasta atual do capitulo
Settings
| Field | Description |
|---|---|
| Access group name | Access group name |
| Enabled | Indicator whether the group will be applied to senhasegura |
| Requires reason to run task | Indicator if user needs to justify why they want to perform the task |
| Requires approval to run task | Indicator whether an approver will need to authorize the execution of the task |
| Approvals required to run | Number of approvals required to perform task |
| Disapprovals required to cancel | Number of disapprovals required for execution to be canceled |
| Approval in levels | Indicator if senhasegura will involve level-by-level approvers as approvals take place |
| User can download the task resulting files | Executing users will be able to download the output file of the execution. |
| User must provide a reason for downloading files resulting by the task | Users should indicate why they want to download the output file of the execution |
| Governance ID required when justifying? | Prompts the user for the linked maintenance ticket number |
| Always add user manager to approvers? | Indicator if the administrator of the Department to which the user belongs will be added as an approver at the time of request. |
Criteria
| Field | Description |
|---|---|
| Device (comma separated) | Hostname of the devices to be considered in segregation. Use the wildcard character * to create a pattern. |
| Environments | Mark which Environments are considered in the segregation |
| Systems | Mark which Systems are considered for segregation |
Criteria
In this tab you will see which users fall under this access group setting. Click the footer button Add to open the available users dialog. Click the Remove button to remove users from the relationship.
Approvers
In this tab you will see which users are configured as approvers of this group. Through the Level column you set the approval step at levels that this approver will be notified of. Use the same button mechanism in the footer to manage participants.