Setting up notification methods
Configuring an E-mail account
Setting an E-mail Account on senhasegura will allow the application to send notifications about a password change, before a Certificate expiration or even suspect access, for example.
It's important to include valid email addresses because some access requests will be notified to the approvers through email, and likewise the requesters will receive the request disapproval or approval reply.
Setting up an SMTP account
Through the Settings ➔ Notifications ➔ E-Mail ➔ SMTP configuration menu you have access to all registered accounts on the platform.
Like all system entities, accounts can be active or inactive. But in the case of SMTP accounts there must be a standard account. This default account will be the account that platform will use.
Access the new account registration through the New report action, and fill the blanks.
Account Name: Account name for internal identification and distinction from other registered accounts;
Enabled: Flag it if this account is active for use on the platform;
Sender email: The email account that will be used to perform the sending;
Reply email: The email account that will receive the reply from the recipient;
Reply email (return path): Return email for error cases;
Confirmation email: Email for reading confirmation;
Default Account: Flag whether this account will be the platform's default sending account;
Send read receipt: Flag whether to forward the read confirmation request;
Force settings use: Flag whether the email accounts set to Reply , Return-Path, and Confirmation must be maintained or can be changed by the module that performs the submission;
Enable footnote: Flag it if the automatic footer should be added in the email body;
SMTP server settings:
SMTP Host: Serveraddress that hosts the SMTP service;
Port: SMTP service port;
Use a safe connection: Flag i if the sender should be done by protocols with encryption;
Secure connection type: Type of cryptography. TLS or SSL;
Use authentication: Flag whether the server requires authentication or not;
Ignore certification error: Ignore SMTP server certificate errors;
Credential for authentication: The credential to be used for authentication on the SMTP server;
When you save the registration the account will be available for submission testing and also for platform use.
Perform the submission test using the Send test mail record action. Fill in the recipient, subject, and email body fields and click Send . The email is immediately sent.
Emails forwarded by the platform can be seen in the report accessible in Notifications ➔ Email ➔ Outbox.
Setting up a POP3/IMAP account
Through the Settings ➔ Notifications ➔ E-Mail ➔ IMAP Configuration / POP3 menu. In this report, you have access to all inbox accounts that senhasegura will interact with. Through the New report action you can register new accounts.
Account name: Name of the sign-in account for the identification of the record on the platform;
Keep copy on server: Flag whether the received email should have a copy in the POP3/IMAP server inbox;
Automatic check: Flag whether the platform should read inbox messages automatically;
Enabled: Flag whether the account is active for use on the platform;
Server configuration:
Address: Server address that hosts the POP3/IMAP service;
Protocol: Inbox read protocol. POP3 or IMAP;
Skip certificate: Flag whether inbox server certificate errors should be ignored;
Credential for authentication: The credential that will be used for authentication;
Port: The port on which the service is running on the target server;
Use safe connection: Flag it if communication with the service should be done using encryption;
Secure connection type: Type of cryptographic algorithm.
Then Save the registration.
Integration with SMS service
senhasegura has an integration with Zenvia2 SMS service.
To be able to use this feature it is necessary to have an account Zenvia.
To configure this feature access: Settings ➔ System parameters ➔ System parameters and click on the tab Notifications, as in the picture notificacoes-0005-enus.
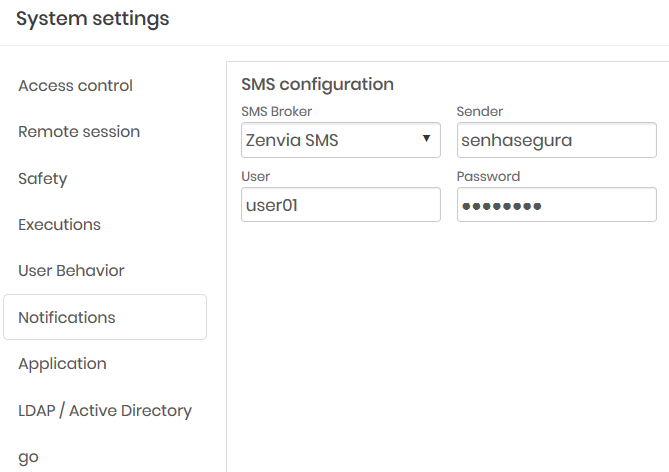
In the field SMS Broker select the service Zenvia
Then enter the name that will appear in the message in the Sender field
In the field User enter the username of the user Zenvia who will be responsible for notifications
Enter the password of this user in the field Password and finally click Save.
With this setting you will need to adjust an SMS notification for this:
Create a new notification by logging in: Settings ➔ Notifications ➔ Settings
Enter a name for the notification and select the option SMS as in the figure notificacoes-0006-ptbr
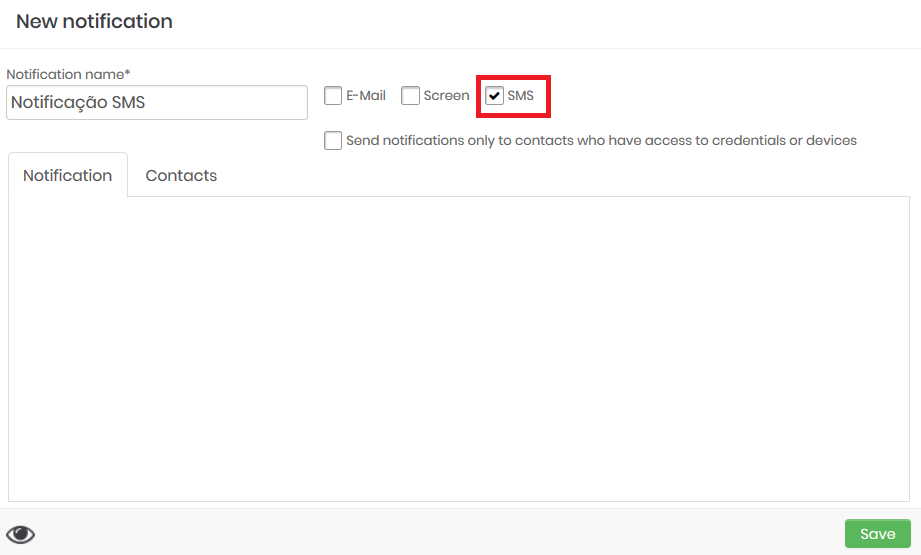
SMS notification register Click the Save button and wait for the window to reload. If it closes, go back to the notification registration report and click the action button Edit of the newly created notification.
Select the type of Notification that will be sent by SMS. The types of notifications that can be sent by SMS are:
Access behaviour
Workstation alerts
Expiration of certificates
About remote sessions
Password operations
Password backup
Audit of commands
Equipment connectivity
About protected information
Operations with credentials
Monitoring
Then in the tab Contacts add the users who should receive these notifications by SMS
cautionUsers selected to receive this type of notification must have their mobile phone numbers registered in the senhasegura .
Click on Save to finish.