Providing a new application
For the access to credentials by applications, separately from common users, the senhasegura has the functionality A2A where each application will have its own access group. Also implementing the principle of unique privilege where an application will not have access to the same information as another application.
It is possible to link devices and/or protected information to a WebService A2A authorization.
To perform a provisioning follow the instructions:
Access the menu A2A ➔ Applications and click on the action button of the report, choose the option New
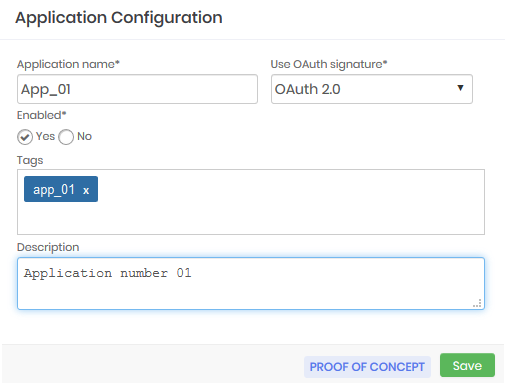
In the form enter the name of the application that will be provisioned and the type of signature that you will use in the field *Use OAuth signature**
Indicate if this application is Active for use
If you want to insert Tags of identification and a Description about the application.
Click Save.
With the configuration done wait for the screen to be updated or use the update button located on the top bar of the report. When the created application is available in the report click on the respective action button and choose the option Authorizations. In this form you will define which credentials the created application will be allowed to access, fill in the information:
Select the System and the Environment that the application will access
Then indicate the credentials that the application will have access to in the field Access Credential and click on the button Add, perform this process for all the credentials you want to include. You can also select the box Register a new credential in the safe to indicate a credential that is not yet registered in the senhasegura , but for this it will be necessary to select the device, which must already be registered in the system, in which this credential grants access, then indicate the username and password of the credential. Click on the add button, perform this process for all the credentials you want to include. The credentials and respective devices that the application will have access to will be listed in the table below.
Go to the tab Security
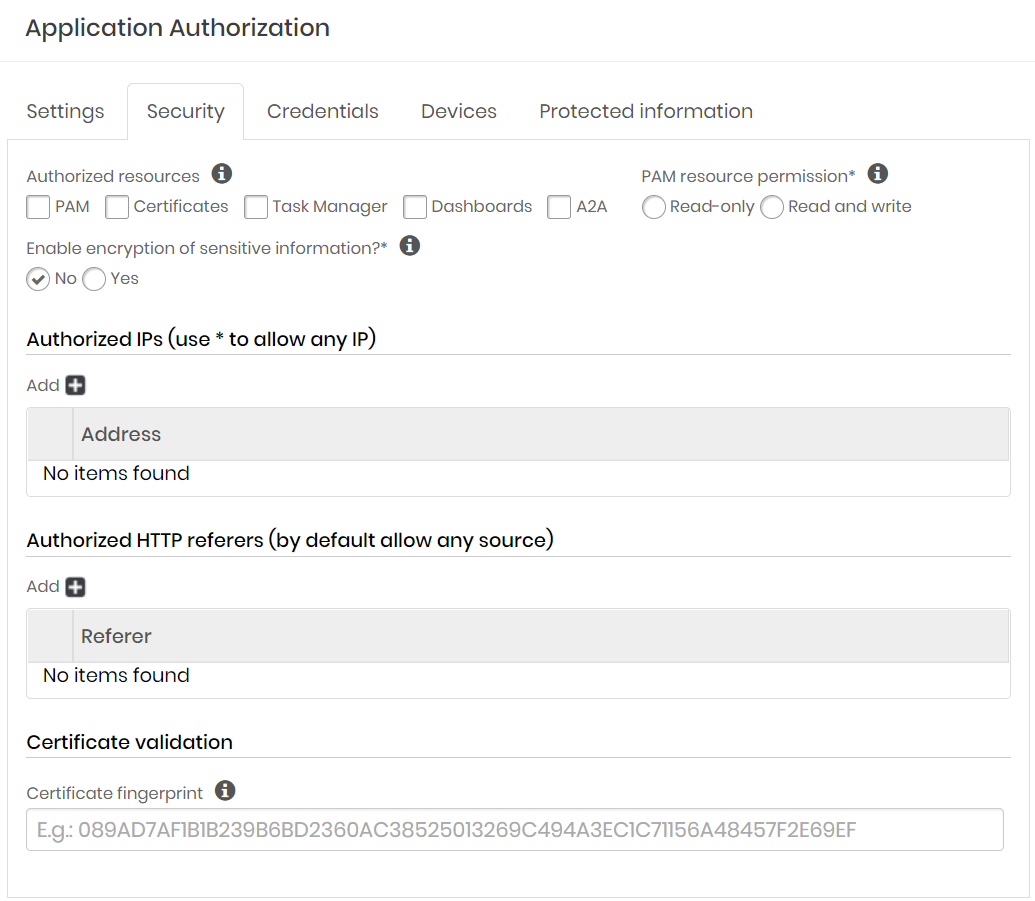
Indicate which resources the application will have access to:
PAM Core: Provisioning and querying credentials, SSH keys, and other protected information from the PAM module.
Certificate Manager: Requisitions, consultation, signing and other activities of the Certificate Manager module
Task Manager: Creating and changing Task Manager module activities
Dashboards: Knowledge and consumption of the data printed on the dashboards.
A2A: Consultation and registration of A2A applications.
Determine the type of interaction level of client applications with the senhasegura modules in the PAM resource permission field.
cautionThis field is only required if you have selected the PAM module in the Authorized resources
It is important to remember that if the configuration grants read-only permission users will not be able to attempt to make a change, in which case the following error will be displayed:
{
    "response": {
        "status": 400,
        "mensagem": "1039: Without PAM Configuration Access permission",
        "erro": true,
        "message": "1039: Without PAM Configuration Access permission",
        "error": true
    },
    "exception": {
        "code": 1039,
        "message": "1039: Without PAM Configuration Access permission",
        "detail": ""
    }
}
In the *Enable encryption of sensitive information?** field, indicate whether additional encryption will be used to access the application.
Then in the field Allowed IPs you can indicate from which IP's the application can access. To do this click on the button with the add icon and enter the addresses.
In the Referers allowed field you can determine that only referrals with the indicated content will be allowed. To do so, click on the add icon button and enter the allowed contents.
In the field Certificate Validation you can link an SSL certificate fingerprint to authorization.
If linked, the senhasegura will validate the CA of the client's SSL certificate with each certificate authentication process.
cautionUsing the certificate does not replace the validation of the other methods, the certificate will be used in conjunction with OAuth 1 or 2.
This way in addition to authentication with OAuth the user has to send the certificate and key as in the example:
curl --cert /path/to/certificate.crt --key /path/to/certificate.key
--connect-timeout 5 -s --show-error --fail -X POST
-d ${POSTDATA}
"${SENHASEGURA_URL}/iso/oauth2/token"
To finish click Save.
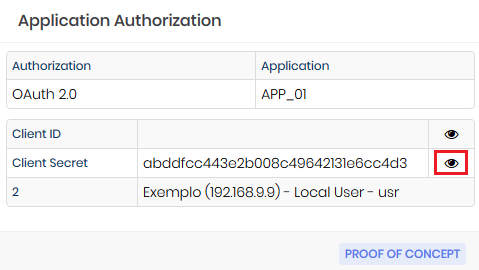
Back to the report click again on the action button of the application and choose the option Authorizations. The newly created authorization will be displayed, click on its respective action button and choose the option View. A screen with the Client ID and Client Secret will be displayed, to view each of the information click on the icon as in the image integracao-0005-enus.
Authorizations for the application
In order see a list of all authorizations per application, go to menu A2A ➔ Authorizations for the application. In this screen besides being able to see the authorization details, it is also possible to edit it and create a new one.
The screen will only show the authorizations for the applications that have already been created and saved successfully.
We recommend the use of this screen in order to see a list of authorizations per application in one place, without the need to enter each application individually to check its authorizations.