Terminal Proxy
senhasegura Terminal Proxy is an SSH service operating on standard port 22 that authenticates the senhasegura user using the same account that the user uses in the web interface. This login respects the same account lockout and MFA settings.
senhasegura authenticates on the target device using the native protocols of the requested session. Delivering the user an authenticated session with no risk of exposing the credential used.
senhasegura Terminal
When logging into the senhasegura server using SSH, the user has the default prompt as below.
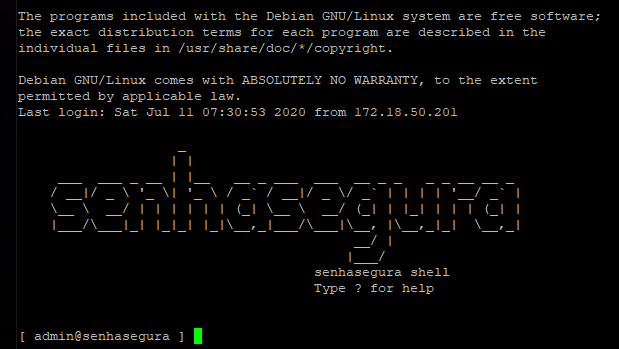
This simplified terminal has only commands to start a proxy session to a remote device and transfer files between the source and destination device. Use the help command to list the available commands and help [command].

To list available credentials for user, use the list command and access data such as connectivity type, Username , Hostname, and IP are listed.
Domain credentials are not listed using this command. To perform access with domain credentials, you need to use the following syntax: ssh domain\user@server.
To visualize the specific username, use the following syntax:
list username –related
Then all devices that an account has access, will be displayed.
To visualize the domain access is necessary to use the following syntax:
list domain –related
Allows the user to verify all domains that a domain credential has access.
Terminal connection
SSH Connection
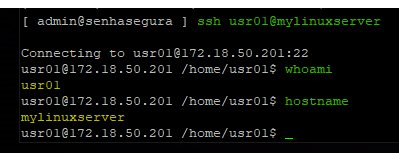
To make an SSH connection to a device with this connectivity linked to a valid credential, run the ssh command followed by the credential and device as you would on a standard SSH connection.
Example: ssh usr01@mylinuxserver or ssh usr01@172.18.50.201.
Access using ssh key
To perform access with ssh keys, use the following syntax, replacing the following strings with:
keyValue: ssh key value
valtServer: senhasegura instance
targetDevice: device you want to access
Accessing a senhasegura instance
ssh keyValue@valtServer
Accessing another device
ssh key keyValue@targetDevice
Accessing another device or when a key and credential have the same name.
ssh key\keyValue@targetDevice
To access the device or when a key and a credential have the same name, use the SSH key to make Multihop connections.
ssh userss[key\credential@device]@senhasegura
Access using Multihop
To facilitate access to the target device in applications that do not provide interactive prompts is used Multihop to connect directly to the target without executing additional steps. For the examples, use:
valtUser: senhasegura user
valtServer: senhasegura instance
targetUser: credential you wish to use for access
targetServer: server you want to access
Default connection with only the user and senhasegura server
valtUser@valtServer
Connection containing the user and target server
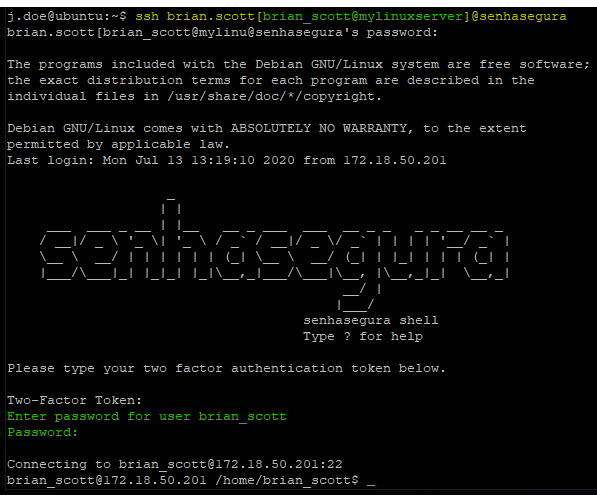
In this example, senhasegura will connect directly to the destination server without delivering the intermediate terminal. The credential and target device are in brackets.
valtUser[targetUser@targetServer]@valtServer
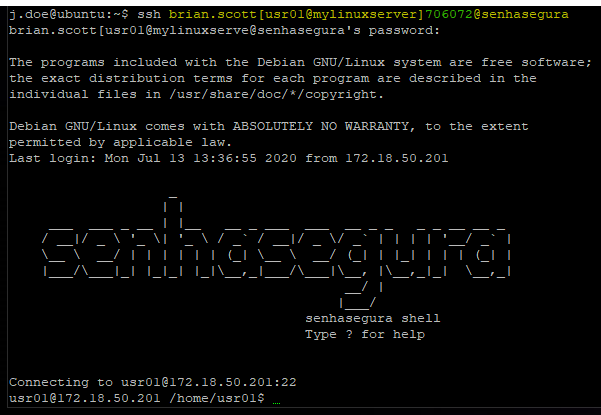
Multihop connection containing the OTP token
valtUser[targetUser@targetServer]2faToken@valtServer
TELNET Connection
For TELNET sessions, run the telnet command followed by the credential and device in the same way. Example: telnet admin@myrouter.
File transfer
For file transfer directly to a target server, it is mandatory to use the multihop connection, because the binaries that travel under SFTP do not have a way to interact with the intermediate terminal.
Due to protocol limitations, the user cannot use a personal credential with the file transfer. Only with a credential that is registered in senhasegura.
The example below uses the WinSCP program as an example.

The following example below uses a command-line version of SFTP.

If the user has an OTP token configured, use the token in the connection string.
Transfer with SCP
Two steps are needed to transfer a file using SCP from the user workstation to a target server.
At the first step, the file is uploaded to the senhasegura using the user terminal proxy.
Second step, the user has to connect to senhasegura Terminal Proxy to upload the same file to a target server.
To use the scp command, use the syntax below, replacing the strings with:
fileName: File to be transferred
vaultServer: senhasegura instance
vaultUser: credential that will authenticate to the senhasegura instance
fileDestination: Location where the file should be transferred to
Uploading a file to the senhasegura instance
scp fileName vaultUser@vaultServer
Downloading a file from the senhasegura instance to the requester workstation
scp vaultUser@vaultServer:fileName fileDestination
The SCP syntax does not support multihop connection strings, making both steps mandatory. Use the SFTP transfer for a better experience.
Automated privilege elevation
senhasegura can allow a user to perform elevated tasks, like SUDO, without knowing the credential password. In these cases, the user will have its interactivity captured, and senhasegura will perform the elevation using the same credential used to authenticate in the target device.
Note in this first example that the user executes a super command without having to enter the credential password.

If privilege elevation is inactive on the session, the device credential password is requested.
Interactivity blocking and compulsory logout
If the administrator activates interactivity blocking, the operator user will be warned by a message in the upper right corner.
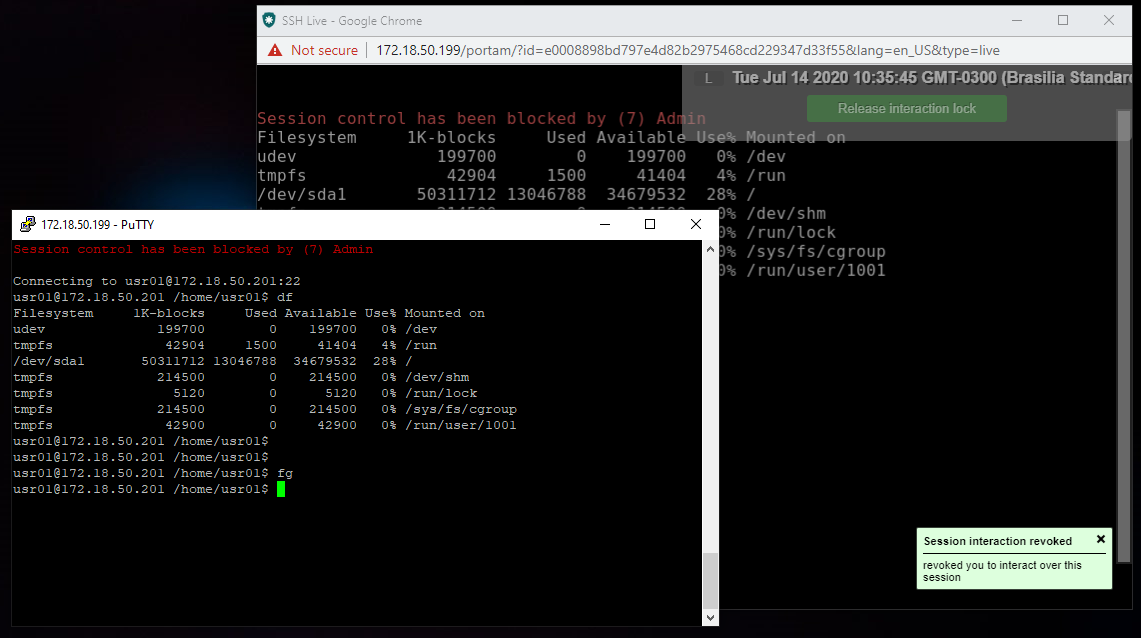
And if the administrator compulsorily logout the session, the user is also warned.