Multi-Tenant
The credentials managed through senhasegura are of extreme importance for a company. Many of them, for a specific set of departments. So important, that other departments cannot be aware of the existence of such credentials.
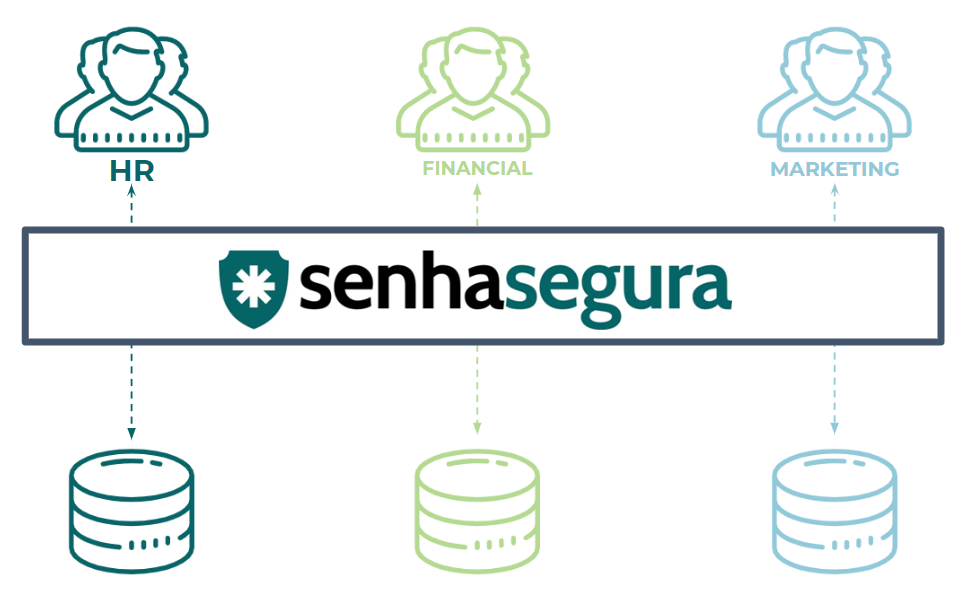
The Multi-Tenant local senhasegura function simplifies the segregation of credential access, allowing one instance of the software to be used by several "clients" sharing the same physical and logical structure.
In other words, data from an internal customer is not visible to others, as exemplified by the figure multi-0001-enus.

This way, we can say that the I.T. department credentials administrator has no access to the Development department credentials. Ensuring that information is accessible only to users who actually need it.
To set up a multi-tenant environment follow the instructions in the following sections.
By acquiring this function of senhasegura some screens will be segregated by tenant:
Creating users
Creation of credential
Creating access groups
PAM
Certificates
Task Manager
Protected Information
A2A
Creating a tenant
Before creating a tenant keep in mind the environments you want to be segmented, after that follow the instructions:
Go to the menu: Settings ➔ System Parameters ➔ Segmentation ➔ Tenants
In the action button of the report click on the New option
infoIn this same report you can also change an already created tenant. Click on the action button Change record.

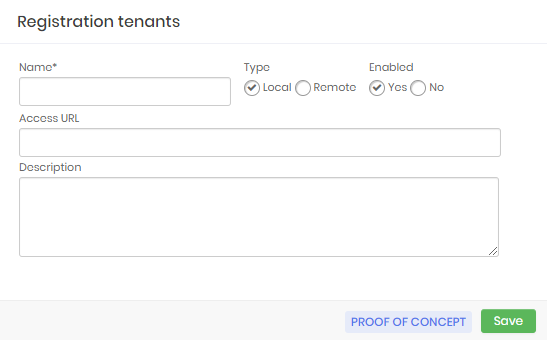
Insert your tenant's name
Type the URL, if you have, of this tenant in the field URL access
And if you wish to insert a itemize about the scope of this tenant.
In the checkbox Type select whether the tenant will be accessed locally or remotelly.
Finally click on Save
Associating a user with a tenant
With your created tenant you will be able to associate a senhasegura user with it. To do this follow the instructions:
Go to the menu: Settings ➔ System users ➔ Users
Create a new user1 via the report action button and the New option, or change an existing one.
In the form, in the section Tenant select the tenant you want to associate this user with
cautionIf the user is not associated with any tenant, the system will associate him/her to default, so he/she can only be added to the access groups of the default tenant.
Click Save
Associating an access group with a tenant
After associating a user it is important to associate a group of access to tenant as well.
Access groups usually have different settings between them.
However, it is important that these groups are associated with the tenants to which they belong, and that users can access them. For example:
*A Financial tenant user should not be a member of Marketing tennant's access group since they are part of different departments that should not be aware of each other's information.*
It is therefore very important to have access groups for your respective tenants, so follow the instructions:
Go to the menu: PAM ➔ Settings ➔ Access ➔ Access groups
Create a new group2. using the report action button and the New Group option, or edit an existing one.
In the form, select the tenant that the access group should be associated
Go to the Users tab and select the users you previously associated with the same tenant from this group.
cautionRemember that if the user must be associated to the same tenant of the access group, in his registration or later be edited to be associated, otherwise he is not available among the options of users to become a member of the group.
Click Save
Associating a credential with a tenant
With users and access groups associated with tenant you must also associate credentials.
This way the associated credential will be visible only to the users who are associated to the same tenant, with this the objective of the module to restrict the access to the information, to those who actually need it, will be reached. To do so, follow the instructions:
Go to the menu: PAM ➔ Credentials ➔ All
Create a new credential3 through the report action button and the option New credential, or change an existing one.
In the form, select in the field Tenant the tenant to which this credential will be associated
This way the credential can only be accessed, or have your password viewed by users and members of access groups associated to the same tenant.
Security
The multi-tenant function will assist in segregating user access by separating information by location, department, or other type of tenant you wish to create.
However, administrators should pay attention to the following points:
Backup: The segregation by tenant does not cover the backup, which means that the administrator who holds the master key will know all the information present in each of the tenants registered in the vault.
Dashboards: Users, regardless of which tenant is associated, with permission to view the dashboards will be able to see all information present on these screens.