Access Workflow
We learned previously how to configure access groups with your security criteria and rules to gain access to inside information.
Now we will see in practice how this is presented to the user when he requests access to privileged information.
The PAM Core access group is used in two moments, and the rules of justification and authorization occur in both situations:
Password withdrawal;
Proxy access;
When a user tries to make use of a credential in any of these situations, senhasegura checks which access group, in which the user is related to the credential, has the most restrictive rule.
As we saw earlier this path can take the following options:
Allow access to information;
Allow access by requiring a justification on the part of the requester;
Allow access within a time range and an approver;
In the first and second case, there is no use of the workflow. The requester will be able to access the information immediately. senhasegura will only record access in all compliant audit reports and forward to SIEM the messages of the actions taken.
Access through justification
If the requesting user needs to record the reason for using the inside information, a registration screen will be presented. And only after sending the justification will be possible to use it.
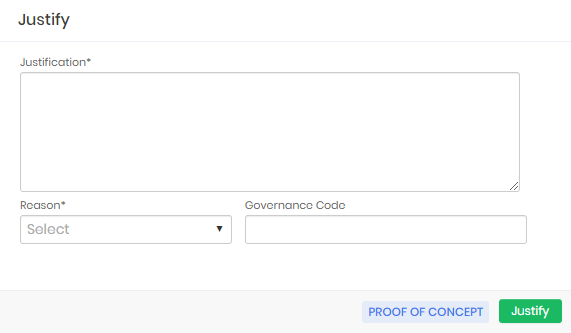
The requesting user can list their requests through the PAM Core ➔ Access control ➔ My requests menu.
In PAM Core ➔ Access Control ➔ Requests on this screen, the column Emergency Access, the values Yes or No inform if it was emergency access or not. After exporting the report, you will be able to apply a filter for this type of access request.
Access through approval
If the requesting user needs approval to perform the same task, the justification screen is presented with the addition of fields for the period. This period is the time interval that the requester needs to use the credential.
After the end of this time, the credential will be available for automatic password change. And if the approval is for a proxy session, the requester will be immediately disconnected.
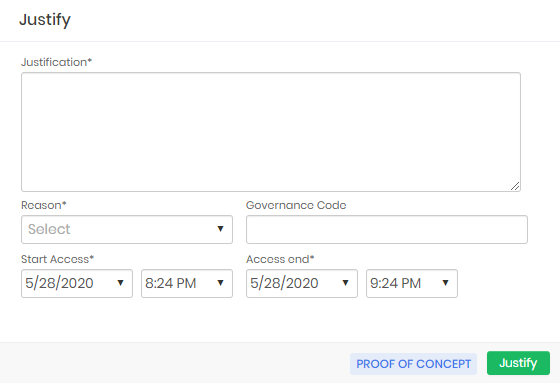
When forwarding the approval request, the user will be presented with the following confirmation screen.
The approver will be notified by email of this request by email.
If the user is a member of an access group with a level approval model, the 1st level approver will receive the email first, after his approval the other approvers will receive the email according to the hierarchy and number of levels defined in the access group configuration.
If the inbox is configured in senhasegura , approvers can reply to the email with the words APPROVE or DISAPPROVE to affect their response. Or he can click on the link described in the email.
Through the system it can be done at the PAM Core ➔ Access control ➔ My approvals menu. Record actions allow you to approve, disapprove and see the detail of the request.
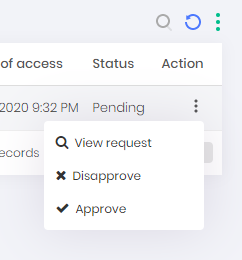
At the time of approval, the approver may change the date and time interval.
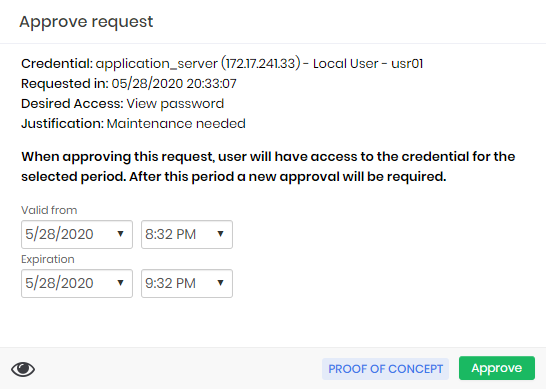
All the requests and the justified accesses can be seen in the report Access control ➔ Requests.
The emergency access
There is a special case in which the requester can skip the approval process if there is a need for immediate emergency use of the credential. We call it emergency access.
When the access group allows the requester to make use of this feature, the requester will be presented with the emergency access screen right after sending the access request.
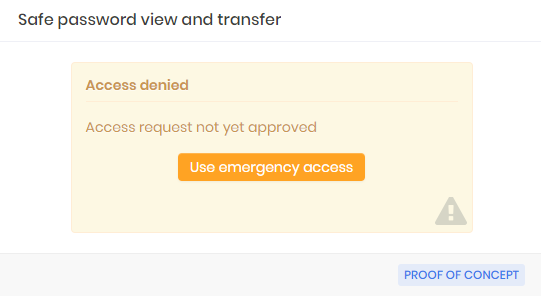
As soon as the requester confirms emergency access, senhasegura will send to all approvers the information that the requester had access to information in advance.
The access request will be marked with emergency use.
ITSM integration
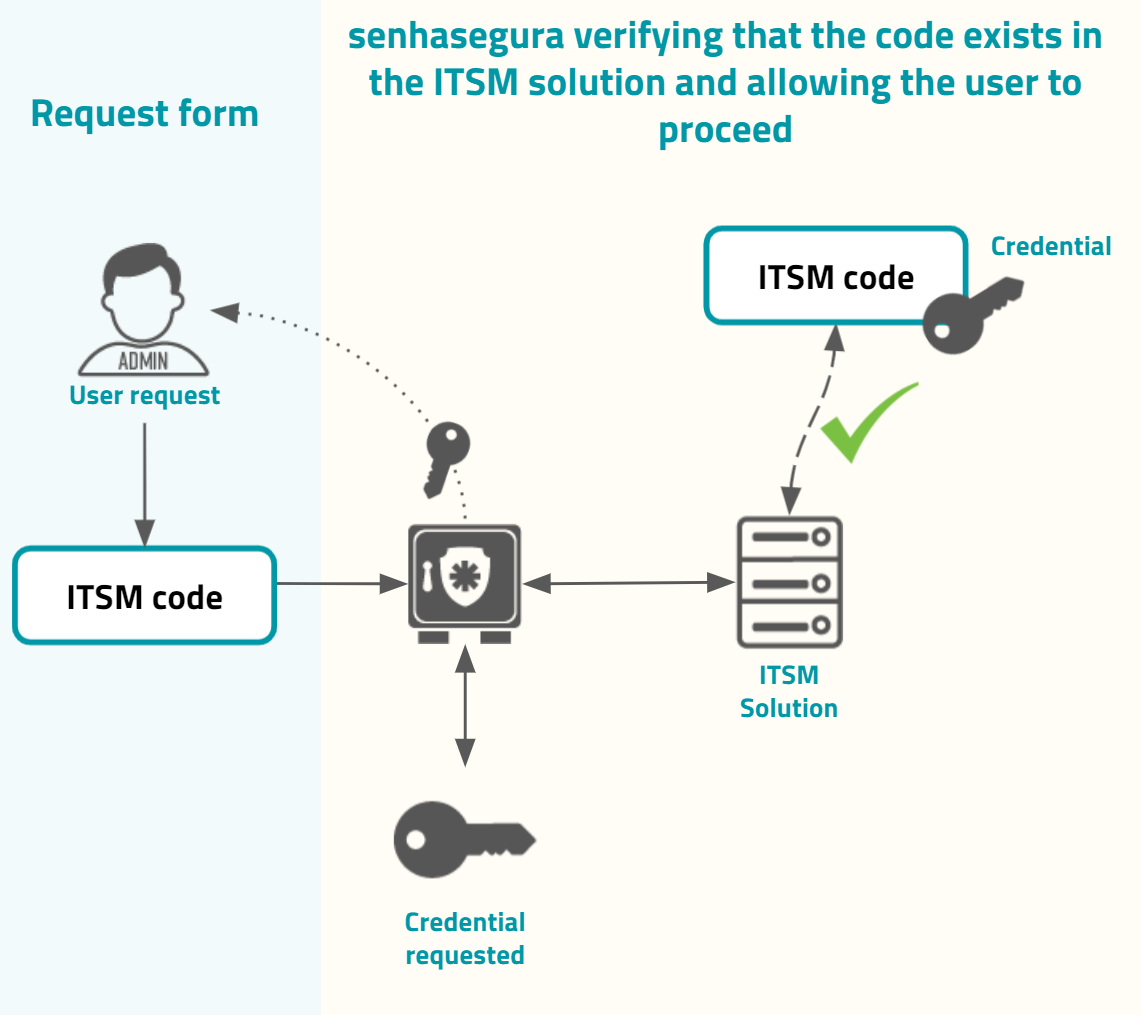
Into the justification and authorization form, the requester user can input the Governance code. This governance code can be used just for evidence or can be integrated into ITSM solutions. If it is integrated with configured ITSM solutions, the senhasegura will first validate with the target ITSM system if the governance code provided grants to the user authorization to execute the operation, if it is the user request is granted, as in the image usr-sistema-0224.
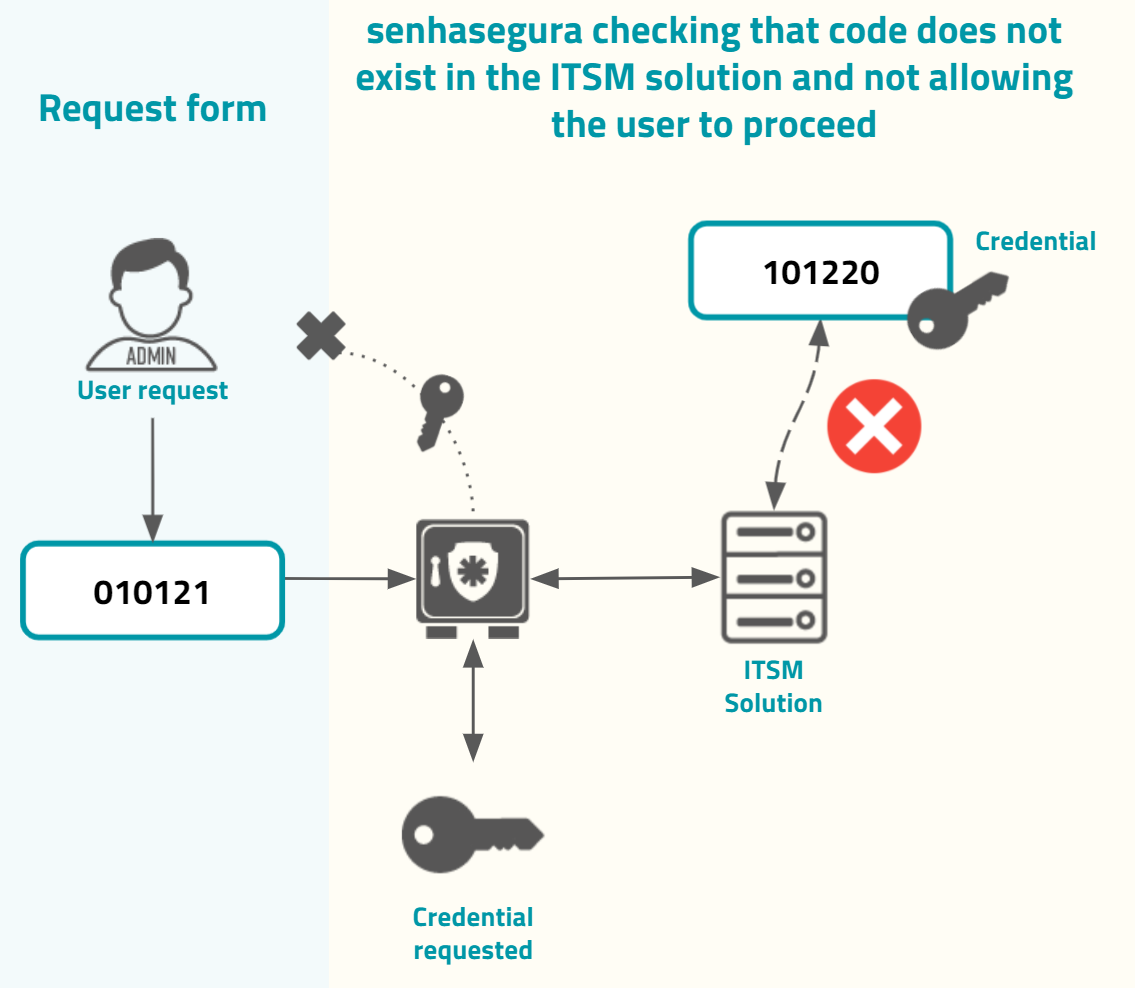
If the code does not exist or is not valid, the senhasegura will not grant the user request, as in the image usr-sistema-0225.
By default, only the following ITSM solutions are provided by senhasegura . You can configure the integration into Settings ➔ System parameters ➔ Integration with ITSM, and then click at the report action button New.
This report also gives the possibility to test every configurations using the Test authentication record action.
If you want a mandatory Governance code to be entered, check the option Governance ID required when justifying? in the users' access group.
Jira Service Desk
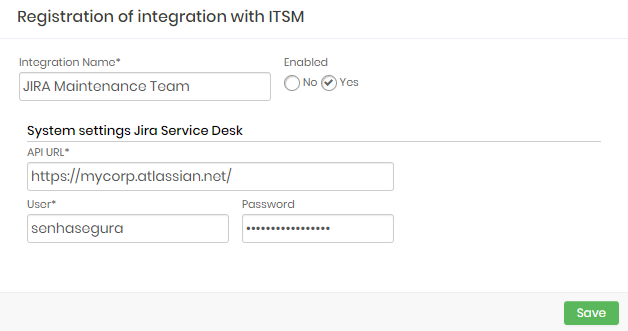
Integration Name: Will be the name of the integration used to identify this configuration inside senhasegura reports;
Enabled: This status flag indicates if this configuration should be used into workflow procedures;
API URL: Should be filled with the main JIRA URL. This URL will be used to access the JIRA REST Endpoint;
User: A valid user with the right permission to query issues tickets inside JIRA;
Password: The JIRA user password;
The JIRA integration will query the given ticket code using the /rest/api/2/issue/ endpoint. The user request will be only accepted if the JIRA issue is under In progress status.
Freshdesk
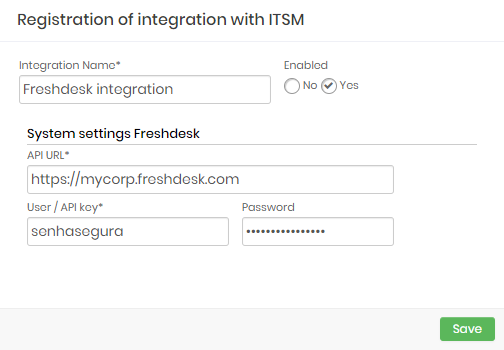
Integration Name: Will be the name of the integration used to identify this configuration inside senhasegura reports;
Enabled: This status flag indicates if this configuration should be used into workflow procedures;
API URL: Should be filled with the main Freshdesk URL. This URL will be used to access the Freshdesk REST Endpoint;
User: A valid user with the right permission to query issues tickets inside Freshdesk;
Password: The Freshdesk user password;
The Freshdesk integration will query the given ticket code using the /api/v2/tickets endpoint. The user request will be only accepted if the Freshdesk issue is under Open or Pending status.
CA Service Desk Manager
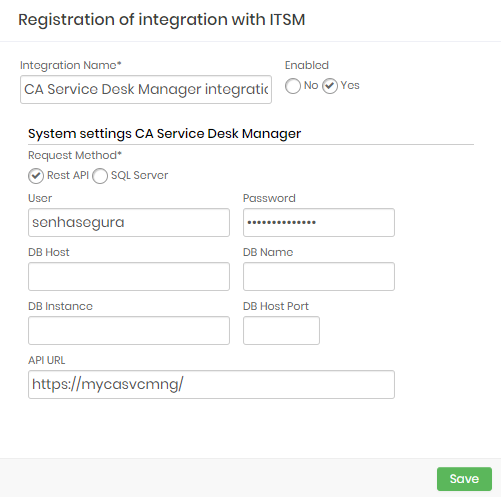
This integration can be configured to runs REST queries or queries directly to CA database.
Integration Name: Will be the name of the integration used to identify this configuration inside senhasegura reports;
Enabled: This status flag indicates if this configuration should be used into workflow procedures;
Request Method: Configure witch kind of communication senhasegura will execute into the CA software;
Rest API: will require HTTPS connection between senhasegura and the CA solution. The following fields should be filled if you choose the REST API method:
API URL: Should be filled with the main CA URL. This URL will be used to access the CA REST Endpoint. Used only if REST API request method was selected;
User: A valid user with the right permission to query issues tickets inside CA;
Password: The CA user password;
SQL Server: Will require a SQL Server connection between senhasegura and the CA solution. The following fields should be filled if you choose the SQL Server method:
User: A valid user to connect into SQL Server;
Password: The database user password;
DB Host: Hostname or IP where the CA database is located;
DB Host Port: The TCP port to connect;
DB Name: The CA database name;
DB Instance: The granted database instance;
Zendesk
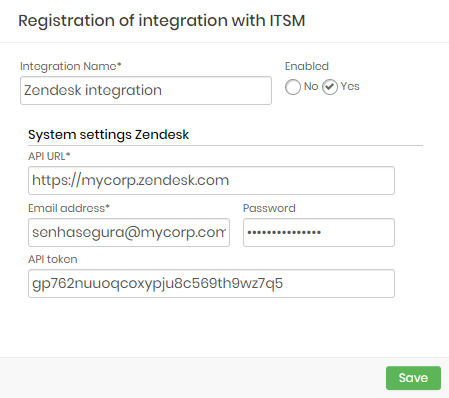
Integration Name: Will be the name of the integration used to identify this configuration inside senhasegura reports;
Enabled: This status flag indicates if this configuration should be used into workflow procedures;
API URL: Should be filled with the main Zendesk URL. This URL will be used to access the Zendesk REST Endpoint;
Email address: A valid user with the right permission to query issues tickets inside Zendesk;
Password: The Zendesk user password;
API Token: A valid OAuth token to identify senhasegura ;
The Zendesk integration will query the given ticket code using the
/api/v2/tickets/[id].json endpoint. The user request will be only accepted if the Zendesk issue is under Open or Pending status.
ServiceNow
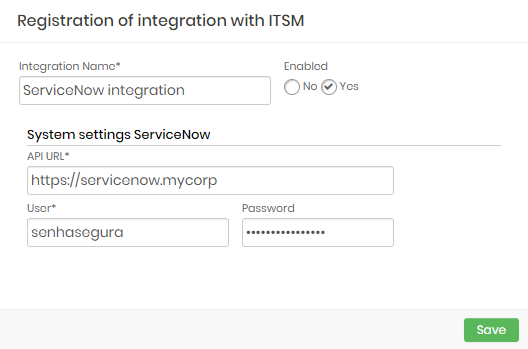
Integration Name: Will be the name of the integration used to identify this configuration inside senhasegura reports;
Enabled: This status flag indicates if this configuration should be used into workflow procedures;
API URL: Should be filled with the main ServiceNow URL. This URL will be used to access the ServiceNow REST Endpoint;
User: A valid user with the right permission to query issues tickets inside ServiceNow;
Password: The ServiceNow user password;
The ServiceNow integration will query the given ticket code using the /api/now/table/ endpoint. The user request will be only accepted if the ServiceNow issue is under In Progress status.